🐾 Unleash your inner coder with the smartest robot dog on the block!
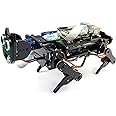
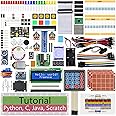
The FREENOVE Robot Dog Kit is a programmable, multi-functional robotic pet designed for Raspberry Pi users. Featuring 12 servo motors for realistic walking, a rotatable camera with ultrasonic sensing for face recognition and ball tracking, and wireless control via a dedicated app, it offers an immersive hands-on coding and robotics experience. Compatible with multiple Raspberry Pi models (not included), it comes with detailed Python tutorials to guide assembly and programming, making it ideal for tech enthusiasts and educators eager to innovate.
| Standing screen display size | 3 Inches |
| Processor | none |
| Card Description | Dedicated |
| Brand | FREENOVE |
| Series | FNK0050 |
| Item model number | FNK0050 |
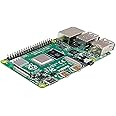
| Operating System | Raspberry Pi OS |
| Item Weight | 2.14 pounds |
| Product Dimensions | 3.94 x 0.39 x 5.91 inches |
| Item Dimensions LxWxH | 3.94 x 0.39 x 5.91 inches |
| Processor Brand | Freenove |
| Number of Processors | 1 |
| Computer Memory Type | DDR DRAM |
| Hard Drive Interface | Unknown |
| Manufacturer | Freenove |
| ASIN | B08C254F73 |
| Date First Available | June 29, 2020 |
TrustPilot
1 个月前
2 周前