🚀 Take control of your workstation from anywhere—because your desk should never limit you.
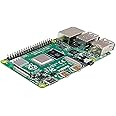
The Geekworm KVM-A8 PCIe kit transforms your Raspberry Pi 4 Model B into a powerful KVM over IP device, enabling full remote control of your computer via web browser. Featuring PoE power support and an onboard active cooling fan, it ensures reliable, professional-grade remote management including BIOS access and OS reinstallation. Ideal for tech-savvy professionals seeking seamless, anytime-anywhere workstation control.


| Processor | none |
| Wireless Type | 802.11b |
| Brand | Geekworm |
| Series | KVM-A8 |
| Item model number | TB-2022-63 |
| Operating System | PiKVM V3 Platform |
| Item Weight | 2.19 ounces |
| Product Dimensions | 4.72 x 3.54 x 0.79 inches |
| Item Dimensions LxWxH | 4.72 x 3.54 x 0.79 inches |
| Number of Processors | 1 |
| Manufacturer | Geekworm |
| ASIN | B0BN1MFHMW |
| Country of Origin | China |
| Date First Available | November 21, 2022 |
B**K
5 minute assembly - works perfectly
I will never build another rack mount system without one of these. Cut my troubleshooting time by 80% on a threadripper that had a finicky BIOS.
K**Y
A Must-Have for Raspberry Pi Enthusiasts
I recently added the Geekworm KVM-A8 PCIe kit to my Raspberry Pi 4 setup, and I couldn’t be more satisfied with the results. This kit offers an incredibly convenient and efficient way to remotely control my computer, all through a simple web browser interface. The assembly process was straightforward, especially with the available online resources, making it easy to get everything up and running in no time.What really impressed me was how seamlessly this kit integrates with my existing setup. The ability to power the system using PoE reduces cable clutter and ensures a clean and efficient installation inside my computer case. The performance is top-notch, allowing me to remotely reboot, access the BIOS, and easily manage my system. This kit has truly transformed the way I manage my Raspberry Pi projects, offering a level of control and flexibility that’s hard to match. This is an absolute must-have if you’re into Raspberry Pi projects and need a reliable KVM solution!
D**E
Pretty Good
Nothing really bad that I can say except for the price.I love this product because it works so well but knocked one star because of the price. If anything, I wouldn't mind this price being at least $50 minimum. That because you would need to buy the Raspberry Pi.Raspberry Pi + This Product + Power Adapter = almost $200 for an iPMI functionAside from that this really works great.
T**F
Great way to add PiKVM to your rig without all the wires
You need your own Pi 4. Just wanted to make that clear.This arrived quickly (within a few days) without the long wait typical of this type of niche equipment. I followed the directions carefully and was successful in assembling the final product. You will need a C1220 battery if you want to use the RTC function.I had to refer to GeekWorm's wiki very closely to get the ATX pinouts correct for the case buttons/LEDs. I eventually noticed the positive / negative information silkscreened on the PCB, but on the opposite side. These are a little tricky to stay attached. I wish that Geekwork had provided another ATX connector for the case side and then connectors to attach the case wires to. I would recommend that you do the case wires last after everything else is installed, cables routed/mounted and then put the individual case ATX wires into the card.Also, the choice of PiKVM image is important if you want the small OLED to work. Download the Raspberry Pi 4, v3 Hat version. I had flashed a different version and had to do it again.Once it was up and running, I connected the OLED and it works well. I'm not sure what to do with it now because it doesn't have a case that came with it. I'm looking on the web for cases I could print on my 3D printer, but seems like this should be included. As it stands, it is on top of the computer case in its little clamshell shipping box.I noted errors in the system log about every 5 seconds about a kvmd-watchdog timer. I dig some sleuthing and eventually found a command that disables the timer. Looks like there is an incompatibility with the PiKVM image and the geek worm hardware. Using the command below fixed the error message:systemctl disable --now kvmd-watchdogAll is good. I'm able to remotely log in, administer the box including BIOS work from the comfort of my living room chair on a laptop. All of the extra wires are inside my computer case, with the only additional wires being power, ethernet and an HDMI jumper cable from the "card" to the HDMI output of the computer. I am happy.
P**L
Awesome device. Lots of functionality. Would Highly Recommend!
I am not normally one to leave reviews but this is great! I enjoyed putting it together. It requires a little bit of technical skill, but I'd assume if you know what a KVM is and have a Raspberry Pi, you will already have enough technical know how.There are detailed videos on how to put it together along with detailed documentation on various PiKVM sites if you need help. I initially couldn't get the video output to work, but I stupidly was using the wrong .img when I flashed the micro sd card. (I initially planned on using the hdmi to usb adapter and had downloaded that image, but then found this device instead) Also make sure you are using the v3 image to get the oled screen to work etc. It's all documented on the wiki pages.The only negative thing I can think about is there isn't really anything to do with the oled screen. I wasn't going to use it, but it's kind of a neat feature so I just have it hanging out the back of the case. Would've been nice if there was a little plastic enclosure or something that you could put on top of your PC or something.Great product, works great! Everything works as advertised. I would definitely recommend to anyone who likes Raspberry Pi projects and needs a KVM that does everything! Can't say enough how happy I am with this.
D**N
Works great. Does the job and does it well.
Worked out great for my 2U server build. The little display is a plus.I carefully crafted a piece of cardboard to cover the backside PCB so I could safely install it resting on metal. I wanted this unit because of the detached display. It works, it's in there and does the job. I had the perfect space for it in this specialized, purpose built machine. Using in production, exactly 60 days of uptime so far.When I built this I also ordered a couple of JetKVMs from Kickstarter. They just got here yesterday, now you can't even get them at all because of tariffs . I wouldn't have been able to put this machine into production 60 days ago without a KVM solution. This was available immediately and works awesome. I highly recommend building it yourself. And this is a great kit to work with. I think it took about 5 minutes to get it all ready to rock. Just watch the video before your unit arrives.Plug in a pi4 with a pikvm image, wire it up... put tailscale on it (make sure to disable key expiry) and it's ready to do the job and do it well.