
下载应用程序


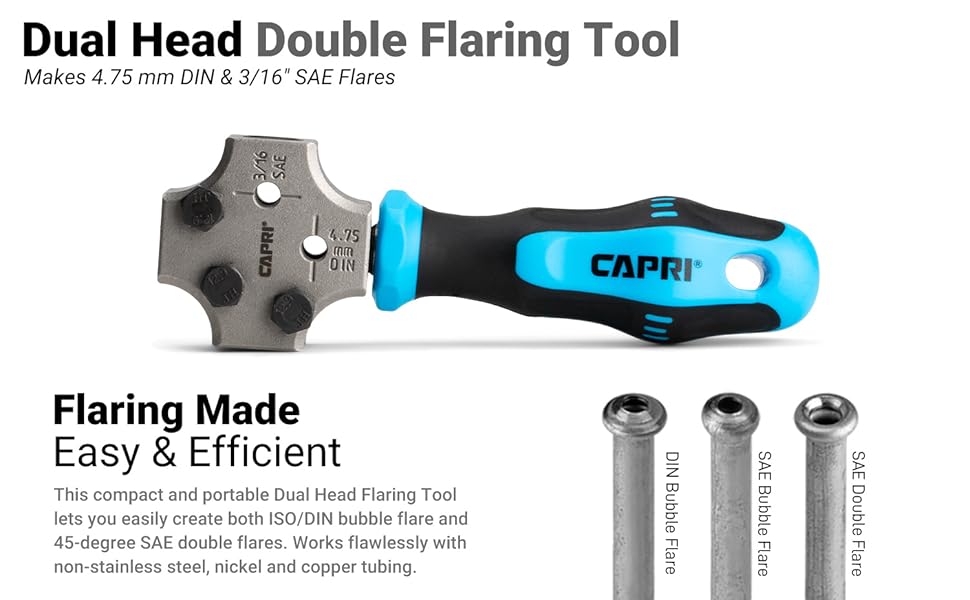
🔩 Master your flares, own the job—fast, flawless, and compact.
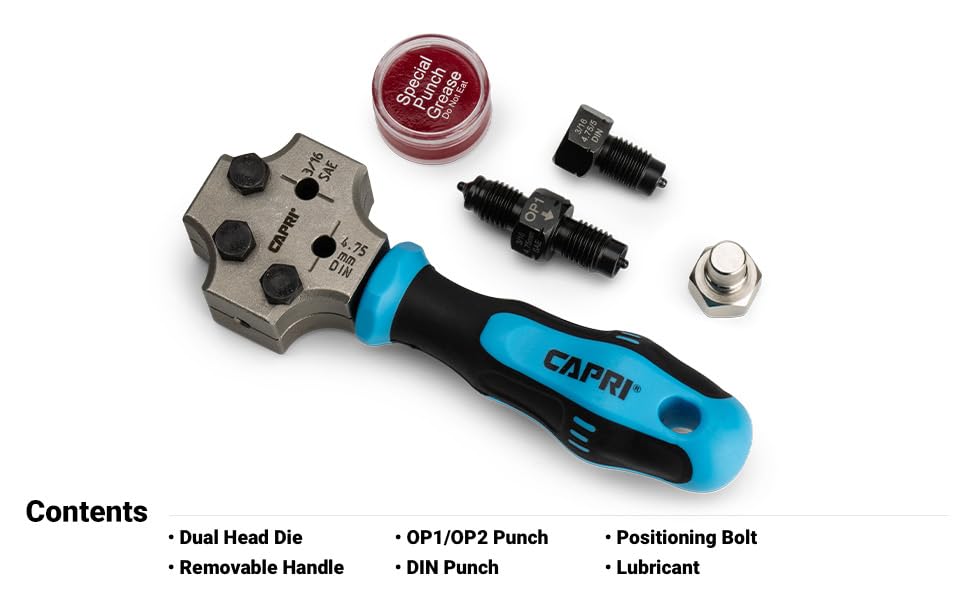
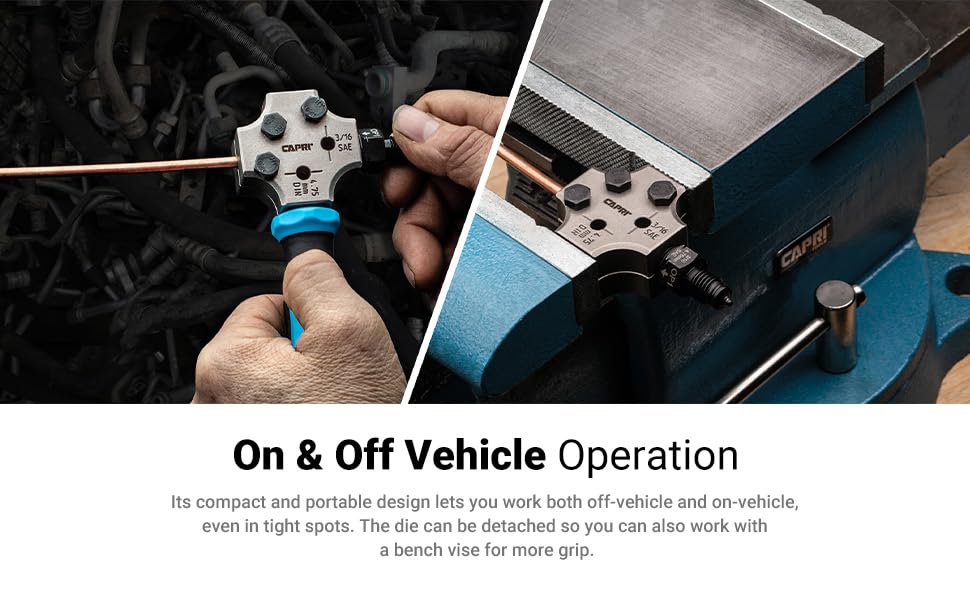
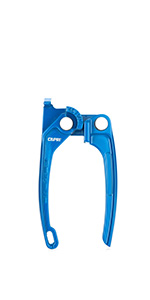
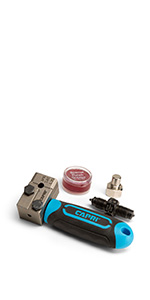
The Capri Tools 3/16 in. Dual Head Flaring Tool is a compact, hand-powered tool designed to create precise ISO/DIN bubble flares and 45-degree SAE double flares on 3/16 in. tubing. Compatible with steel, nickel, and copper tubing, it features a detachable die for bench vise use and requires only a 10 mm and 17 mm wrench, enabling efficient, on- or off-vehicle use in tight spaces.


| Manufacturer | Capri Tools |
| Part number | CP21110-SD |
| Item Weight | 499 g |
| Product Dimensions | 17.78 x 4.83 x 3.23 cm; 498.95 g |
| Item model number | CP21110-SD |
| Style | 3/16 in. Dual Head Flaring Tool |
| Pattern | Flaring Tool |
| Power source type | hand_powered |
| Item Package Quantity | 1 |
| Included components | Flaring Tool |
| Batteries Included? | No |
| Batteries Required? | No |
R**L
This tool performed superbly. It's very solidly made yet compact enough to use in tight spaces. I only had one flare that I had to redo, but that was my fault in not dressing the tube end well enough and not the tool's fault. If you're not producing decent flares it's likely the technique at fault and not the tool - trust me, if I can do it so can you. Cut and dress the end of the tube flat and square. Use a finer file. Heavy score marks left by a coarse file will decrease the odds of a good seal. Lightly de-burr the hole and lightly chamfer the outside edge but don't be too aggressive about it. You don't want to remove too much material, just the excess material. A great tip I picked up from another reviewer is to degrease the tool and the tubing. Use the positioning bolt to set the correct depth and check the fit against the positioning bolt for flat and square through the view holes - both sides - I had one that looked good, but when I looked through the other side it was off just a bit. When tightening down the 3 clamping bolts, there will be one bolt to the side of the brake line and two to the other side. I suggest tightening the bolt that sits alone first, then tighten the other two, alternating across all three to really snug the clamp down. Doing this helps create a lever action to really clamp the tubing tightly. The bolts are good quality Grade 12.9, they'll take quite a bit of torque. I used my 10mm brake bleeder wrench (longer than a standard wrench) and was able to get them pretty tight. Last, make sure you grease the die completely, don't overdo but make sure you get down around the nipple that goes into the tube. If you're flaring vinyl coated factory lines you may have to remove the coating first. Mine was so thick I couldn't even get the flare nut on. I heated up an old flaring nut to push most of the coating back then followed up with a razor knife and 220 grit sand paper. Just be careful not to remove metal, especially at the end where you'll be making your flare. Some others noted that the tool will leave "witness" lines. That is true, but they can be easily addressed with a file and they do not extend to the formed flare itself. They should not interfere with the seal, but I did find that they can cause the flare nut to bind when pushing it up to newly formed flare. Although I didn't use double flares I did do a test flare. The mating surface looked OK, but the flare are was slightly asymmetric. This might be due to the torque the die place on the line. Ideally you want pressure and not torque, which is the purpose in greasing the die. If I were to try again, I think I would drive the die in part way remove and re-grease. I was less impressed with the SAE flare, but the DIN was spot on. I hope that helps.
A**A
Item as described, best tool to do flairs on or off the car. Excellent results
G**R
This is very good tool , I used to make bubble flair. For x5 2005 and it performed very well !
S**N
Needed this to splice in some unions for brake lines after the original lines on my 2004 Mercedes e500 started to rust apart in some sections. The original lines are steel so not easy to bend or flare. This tool did it effortlessly every single time. the ability to flare the lines on the vehicle with this tool and a couple wrenches makes it worth the price tag.
H**S
If you have been struggling to flare steel lines on your car using the cheap bar clamp-style tube flaring tools, this is what you have been looking for. Many other tools like this only handle "soft steel", aluminum, nickel-copper alloy, or other soft metals. Often, the OEM lines in the car are steel. I mangled the OEM brake line installed on my car so many times trying to get a DIN bubble flare with the cheap tool. This gave me a perfect DIN bubble flare the first time, on the car. Note that I prepped the line by both reaming and deburring the end to be flared before using this tool. The die/head of the tool is weighty and substantive. The threaded connection between the handle and the die is probably an M12 or M14; it is very sturdy and will handle the stresses of you cranking on the arbor to form the flare. It's easy to set up. One of the bolts screws in in place of the arbor and sets the depth of the line perfectly. The three 10mm bolts hold the two halves of the die together, which holds the line in place tightly without tearing up the outside like the tools that rely on internal threading to hold the line in place. If you have steel brake lines that you need to flare in situ or don't want to spend $250 for a hydraulic flaring tool that's constrained to a vise, this is what you need. Great tool.