We remain fully operational. Our teams are working around the clock to ensure your deliveries continue safely.

下载应用程序


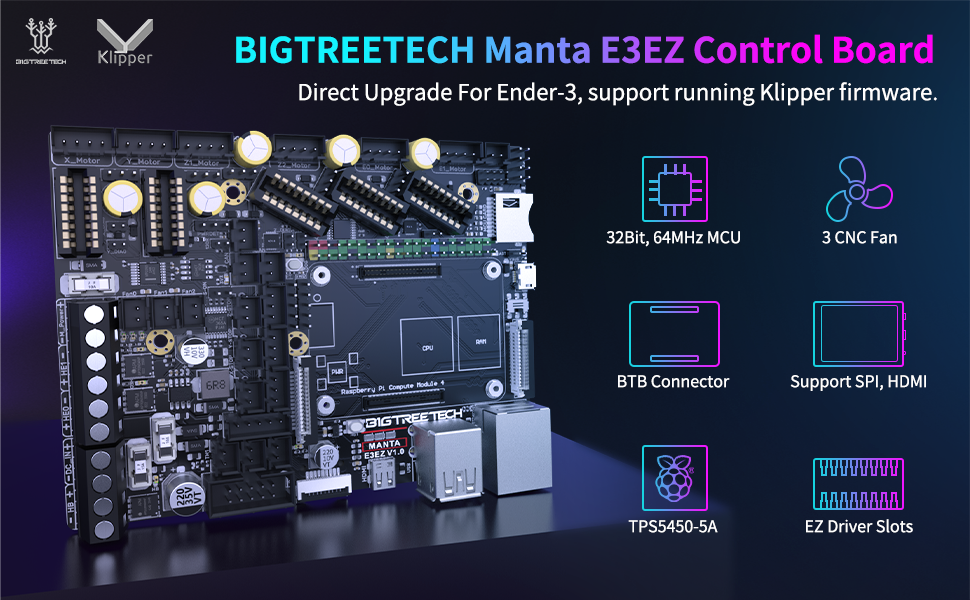
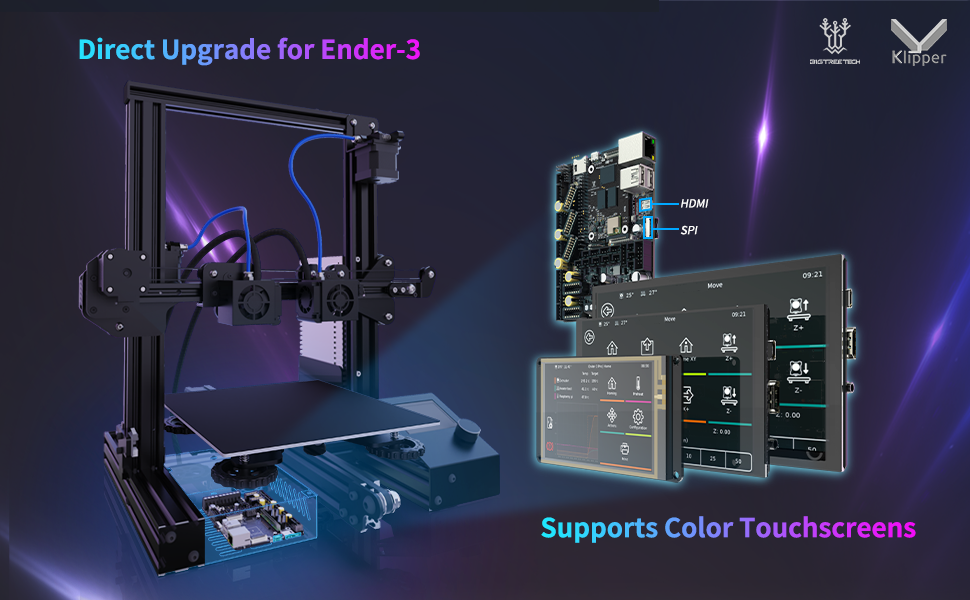
🚀 Upgrade your Ender 3 to silent, smart, and supercharged 3D printing!
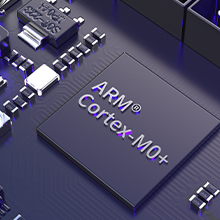
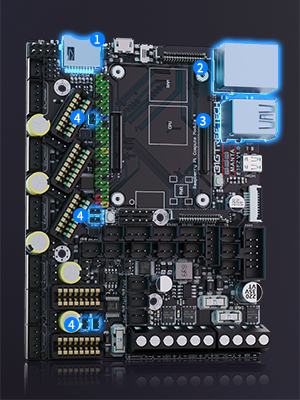
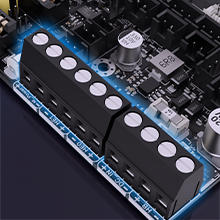
The BIGTREETECH Manta E3EZ + CB1 V2.2 + 5Pcs EZ2209 Kit is a high-performance silent control board bundle designed for Ender-3 series and BIQU B1 3D printers. Featuring a 64MHz 32-bit ARM Cortex-M0+ MCU, a powerful 56V motor supply, and a quad-core 1.5GHz ARM Cortex-A53 processor with WiFi and Ethernet, it supports up to 5 independent stepper motors for advanced multi-axis control. Optimized for Klipper firmware, this kit offers enhanced heat dissipation, easy connectivity, and pre-configured files, delivering a stable, quiet, and highly customizable 3D printing experience.


| ASIN | B0C6LLFBN5 |
| Best Sellers Rank | #51,375 in Industrial & Scientific ( See Top 100 in Industrial & Scientific ) #1,625 in 3D Printer Accessories |
| Date First Available | May 30, 2023 |
| Display Type | SPI Touchscreen or LCD |
| Item Weight | 7 ounces |
| Item model number | KINGPRINT-1029549 |
| Manufacturer | BIGTREETECH |
| Package Dimensions | 7.17 x 4.41 x 2.17 inches |
J**N
Awesome upgrade for Ender 3 or clones.
I have an Ender 3 V2, and I bought this for 2 reasons. 1. I switched from Marlin to Klipper, which required a Raspberry Pi. However, the Pi4 is unstable and would regularly reset. 2. I added a second Z-Axis motor, but it could not be separately controlled. I needed something with 5 independent motor drivers. This has served both these purposes perfectly. The power supply was designed around the power issues associated with the Pi4, and it is quite stable. For dual Z-Axis control, do not use the Z1/Z2 outputs directly. They are both connected to the same driver. In my case, one motor is on Z1, but the other motor is on E1 (Second extruder). In printer.cfg, you just have to add a second stepper [stepper_z1] and use the control pins from the [extruder1] section. Then you will want to add a [z_tilt] section. This will allow Klipper to adjust each Z axis motor to level out the gantry. Separate drivers for each Z motor is also much quieter. The CB1 is pretty good, too. It's comparable in power to a Raspberry Pi 3. BTT's OS image worked without issue. If you are going to use WiFi, remember to connect the WiFi antenna. The module doesn't get reception on its own. And if you have extra motor heatsinks, they are actually perfect for cooling the SOC. As far as value: This is actually the least expensive combination I have been able to find. In many cases, the compute module alone is comparable in price to this entire combo. Prices fluctuate, though, so make this comparison for yourself. This product is not perfect (see the Cons section), but it is about the best you can get at this price point. As far as I'm concerned, if you connect this to an Ender 3, you will have the ability to max it out. If you should need anything more, you'll probably want to get an entirely new printer. Pros: - Great power stability - Great value - 5 motor drivers - Tons of connectivity expansion. Neopixel header, BLTouch header, several fans, accelerometer etc. - CB1 has prebuilt images for Klipper, and the E3EZ has pre-built, annotated config files. - It comes with connectors and pins for assembling connectors as needed. This was MUCH appreciated. Cons: - I hear it has issues with the Ender 3 enclosure. The OS SD card interferes with the side of the case, and applying too much force could strip the SD card slot off completely. I have an external enclosure, so this didn't affect me. But keep it in mind if you are trying to fit it into an ender 3. - Some of the end stop connectors have latches that keep them from fitting onto this board. I simply had to snip them off. Improvements: - It would be awesome if they added support for 12v fans on >12v systems. Perhaps a 12v power stage, or an external fan power input with a jumper. This would open a lot of doors for upgrades - They should probably provide configs and clarify in the overview that you can use something like E1 as a second Z axis driver. That was a selling point for me, but I had to look deeper to see if I could do it.
E**O
Very nice board - My favorite of several I've tried
Let me start by saying that I'm a controls engineer in an engine CNC plant. I have my first 3D printer, a Creality Ender 5 that I've tried several boards on. The stock board works and nothing more - and it's loud. I first switched to an MKS Gen L with TMC2208 steppers and a fanless power supply - Wow, huge difference in noise levels. Then i jumped to a Duet Maestro (Genuine, not a clone) and it's an awesome board - ticks almost every box of mine except being able to customize, change steppers, etc. After that I bought an SKR v1.3 - great board that forced me to learn Marlin 2.0 since it's 32bit. I never installed it because I learned about the SKR Pro before i got around to installing it. This SKR Pro was a bit of a challenge because of how new it is and there's not the same wealth of info like there is for say the Gen L. At first, I though my SKR Pro wasn't working because I couldn't see the SD card when I connected the board to my computer with a USB cable. Kingprint reached out to me right away and answered my questions and pointed me in the right direction. I still haven't connected this board to my printer because I'm happy enough with the Duet. But, I've got the firmware all configured and have tested it with steppers, LCD and thermister as well as the Wifi module. I'm collecting parts for a major overhaul and will install the Pro then - I'm really looking forward to that. The overhaul will include the SKR Pro V1.1, BL Touch, Hero Me fan shroud on an E3D V6 hotend. BTW - I've looked at touchscreens several times and I still come back to the RepRap smart controller 12864 as the easiest, most useful and sensible display of all - especially if you're using Octoprint anyway. Bottom line on the SKR Pro V1.1 - -Buy from Kingprint, they're great to deal with -It's the most versatile and configurable board out there -supports up to 6 steppers, 3 hotends, 3 fans -32bit **Update** I have the board installed and began testing on my Ender 5. I had to go into Marlins' pins file and remap the endstop pins so they would work as X_Max and Y_Max instead of X_Min and Y_Min due to the location of the Ender 5's limit switches. I homed all axis and then moved them to their extents but discovered they were travelling too far. (2x too far). I changed steps per mm from 80,80,400, 415 to 40,40,200,210 and it seems to work but is only a mask IMO. I am using TMC2208 V2.1 but have ordered v3.0 to use UART without extra wires. That might have worked with the V2.1's but I read about the firmware changes required after ordering the V3.0's - Oh well, we'll see
J**R
I am building a Lowrider V3 CNC from V1 Engineering and this forms part of that build. I have done the 3D printing part of the build and gathering all of the necessary parts. Whilst I haven't put everything together yet, after my initial research and inspection of this, I am very happy. I will update the review once I have completed the build.
K**S
The board is generally good quality with decent features and reasonable price. Unfortunately, some of these boards have issues with endstops not working properly. I had to solder extra pullup resistors to get the endstops to work. Other wise great product.
3**Y
Easy to install and configure. Using kipper and the appropriate cm board I replaced my raspberry pi and old ramps controller. Instant improvement and brought my 3d printer to the modern silent stepper drivers.
TrustPilot
1 个月前
1 个月前