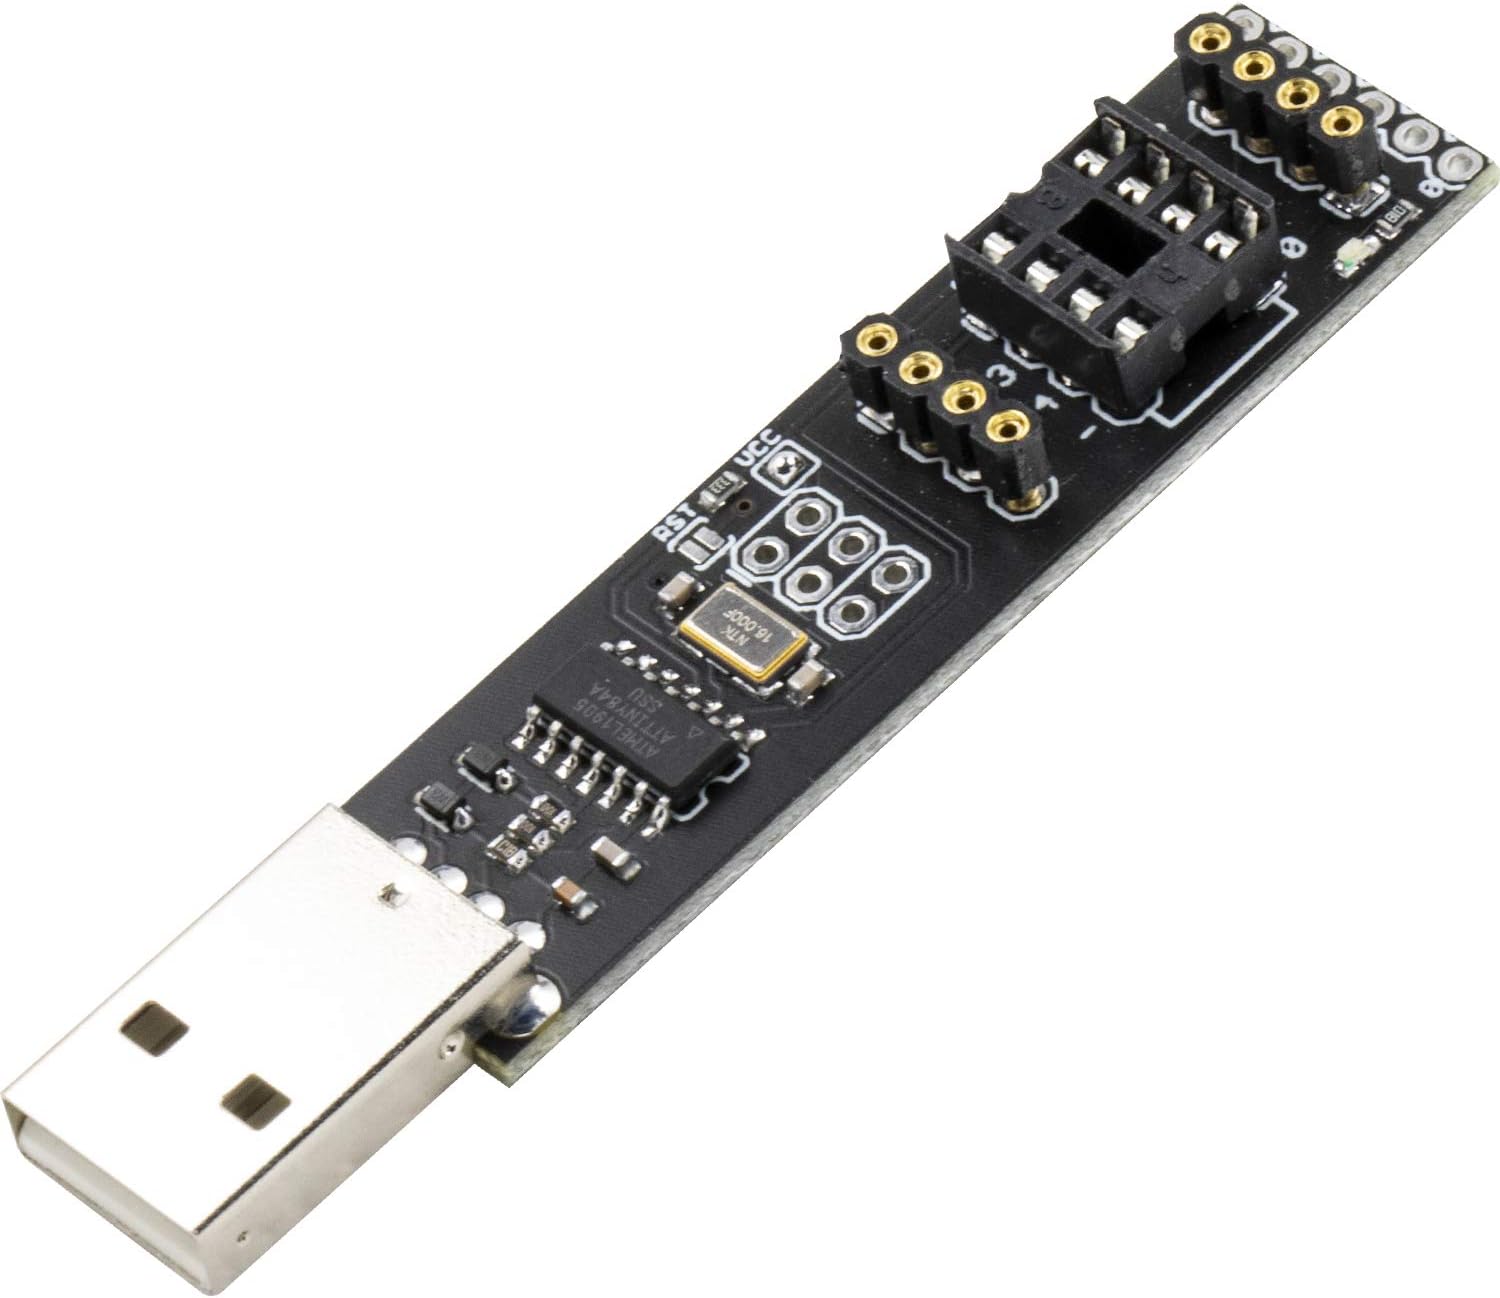
USB Tiny AVR Programmer FabIsp for ATTINY85 downloader
Product ID: 119290639
Details
- Brandflashtree
- Video Output InterfaceUSB
- Graphics Processor ManufacturerAMD
- Recommended Uses For ProductProfessional
- Included ComponentsUSB cable
Desertcart purchases this item on your behalf and handles shipping, customs, and support to Hong Kong.
flashtree USB Tiny AVR Programmer FabIsp for ATTINY85 downloader Review: Super easy to use! - I recently bought an ATtiny85 that I could not program over ISP with a Pololu V2 programmer that works fine with everything else. So I tried this programmer to see if it could be programmed. It works great. There's no instructions included so here's what you need to do: 1. Download the Adafruit USBtinyISP Windows device driver. In the device manager the device will show up as FlashISP if no drivers are installed and "USBtiny" once the drivers are installed. 2. Program the chip with AVRdude. You don't need to specify a COM port as this programmer comes up as a native USB device instead of a serial port. What worked for me was running: avrdude -F -V -C usbtiny -p attiny85 -b 115200 -U flash:w:main.hex It programmed quickly without any errors. Not sure why the chip doesn't work with the Pololu programmer, but it seems fine with this one. So I can recommend this programmer, it does exactly what it claims to. Also the first time I programmed it the fuses were reported as E:FF, H:DF, L:62 if that helps anyone. Review: Works great!... after you figure it out. - I almost returned this because it didn't seem to work. I plugged it in and Arduino IDE wouldn't detect a port. For most info I used the "Tiny AVR Programmer Hookup Guide" (google that) and used the Zadig method to install the driver. That didn't work (or so I thought) then I did tried the 2nd method and still no port in Arduino IDE. I installed the Adafruit driver and still nothing. Found mention of an Instructable and although that got me close it still didn't tell me what I needed to know. So to save you all that trouble here's the solution: Once you've installed the driver (I probably had it working at Zadig), in the Arduino IDE select USBTinyISP as your programmer. That assumes you installed the ATTiny board (open Boards Manager and search for ATTiny). The video above is of the ATTiny running a modified version of the blink sketch. I modified it so I could tell the sketch was running and it wasn't just the default blinking LED. Built-in LED is on pin 0.
| ASIN | B07PBVXQP8 |
| Antenna Location | Professional |
| Best Sellers Rank | #1,733 in Computer Graphics Cards #19,034 in USB Cables |
| Brand | flashtree |
| Built-In Media | USB cable |
| Compatible Devices | Desktop |
| Customer Reviews | 4.4 out of 5 stars 56 Reviews |
| Graphics Card Interface | Integrated |
| Graphics Processor Manufacturer | AMD |
| Included Components | USB cable |
| Manufacturer | flashtree |
| Mfr Part Number | xn-1 |
| Model Name | FabIsp |
| Model Number | xn-1 |
| Recommended Uses For Product | Professional |
| UPC | 721821098693 |
| Unit Count | 1 Count |
| Video Output Interface | USB |
| Video Processor | AMD |
X**G
Super easy to use!
I recently bought an ATtiny85 that I could not program over ISP with a Pololu V2 programmer that works fine with everything else. So I tried this programmer to see if it could be programmed. It works great. There's no instructions included so here's what you need to do: 1. Download the Adafruit USBtinyISP Windows device driver. In the device manager the device will show up as FlashISP if no drivers are installed and "USBtiny" once the drivers are installed. 2. Program the chip with AVRdude. You don't need to specify a COM port as this programmer comes up as a native USB device instead of a serial port. What worked for me was running: avrdude -F -V -C usbtiny -p attiny85 -b 115200 -U flash:w:main.hex It programmed quickly without any errors. Not sure why the chip doesn't work with the Pololu programmer, but it seems fine with this one. So I can recommend this programmer, it does exactly what it claims to. Also the first time I programmed it the fuses were reported as E:FF, H:DF, L:62 if that helps anyone.
T**.
Works great!... after you figure it out.
I almost returned this because it didn't seem to work. I plugged it in and Arduino IDE wouldn't detect a port. For most info I used the "Tiny AVR Programmer Hookup Guide" (google that) and used the Zadig method to install the driver. That didn't work (or so I thought) then I did tried the 2nd method and still no port in Arduino IDE. I installed the Adafruit driver and still nothing. Found mention of an Instructable and although that got me close it still didn't tell me what I needed to know. So to save you all that trouble here's the solution: Once you've installed the driver (I probably had it working at Zadig), in the Arduino IDE select USBTinyISP as your programmer. That assumes you installed the ATTiny board (open Boards Manager and search for ATTiny). The video above is of the ATTiny running a modified version of the blink sketch. I modified it so I could tell the sketch was running and it wasn't just the default blinking LED. Built-in LED is on pin 0.
C**E
Easy to use once you're set up.
I followed the tutorial on the page of the original TinyAVR Programmer at Sparkfun. A lot easier to set up than using an Arduino. In fact, I bought this programmer because I don't have an Arduino Uno, and really don't have the need. So far I have only tested it with Attiny85 and it's great! The construction looks well and clean. I might buy another one as a backup.
J**S
Works great.
The first one came broken but the second one worked great. Was able to get several 85s programmed and doing what I needed them to do.
V**F
eh... it works
Be prepared to spend some time with Google as this item comes with no docs or instructions of any kind. For the price (which is 1/2 what the "name brand" version goes for, I guess that's fair. More annoying is the fact that the connection points for an in circuit type clip programmer are too small for standard .1mm connection cables. I removed mine and soldered the cables right to the PCB of this device. Works great but the closeness of the activity LED to the sockets and it's super small size resulted in the LED melting from the heat of the soldering iron. Oh well, at least it works...
R**G
The Arduino IDE couldn't find a port but it worked anyway
I downloaded the USB driver for this programmer board successfully, but my Arduino IDE menu showed the port grayed out. On a whim, I uploaded the blink sketch anyway and it worked without showing a port! I modified the blink rate to be sure it was really writing to the chip and it was. I can't program a UNO without a port number in the IDE, but it doesn't seem to matter in this case. The only disadvantage I've found so far is the serial monitor won't work without an assigned port. If I find problems when I use the Attiny chip in a project, then I may have to come back and lower the rating I gave this board. Update: while the port is not shown in the roll down menu at the top left of the Arduino IDE, the port being used is shown in the lower right of the IDE window. And, while the Attiny does not have the serial port used on the UNO board, a serial monitor can be created for the Attiny in the sketch.
D**T
Easy, flexible, 3-in-1 solution for programming ATTiny13A and ATTiny85
Easy to use for programming ATTiny13A as well as ATTiny85. This is really a three-in-one solution: 1) program a socketed chip 2) connect a socketed chip in the programmer to a breadboard with jumper wires for prototyping 3) program a chip in-circuit (e.g. an SO8). With avr-gcc, this makes for an easy development environment.
E**S
Beats using an Arduno and breadboard!
After reading some reviews on the setup I got this going and it’s been smooth sailing! It’s quick to setup and I can use the pins on the board to connect it to a breadboard without having to remove the chip each time
Trustpilot
3 weeks ago
2 months ago