Desertcart purchases this item on your behalf and handles shipping, customs, and support to Hong Kong.
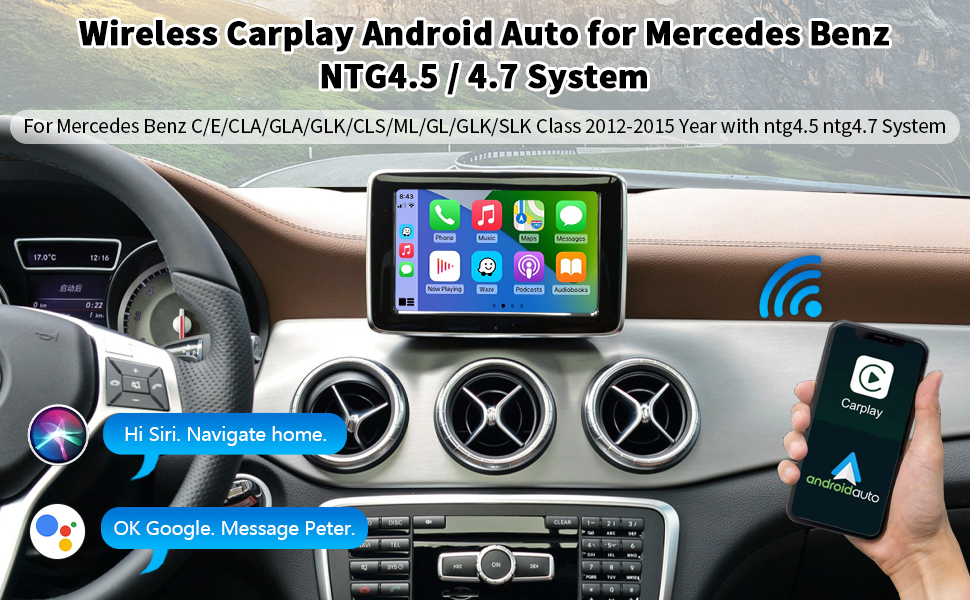
🚗 Elevate your drive: Wireless CarPlay meets classic Mercedes elegance.
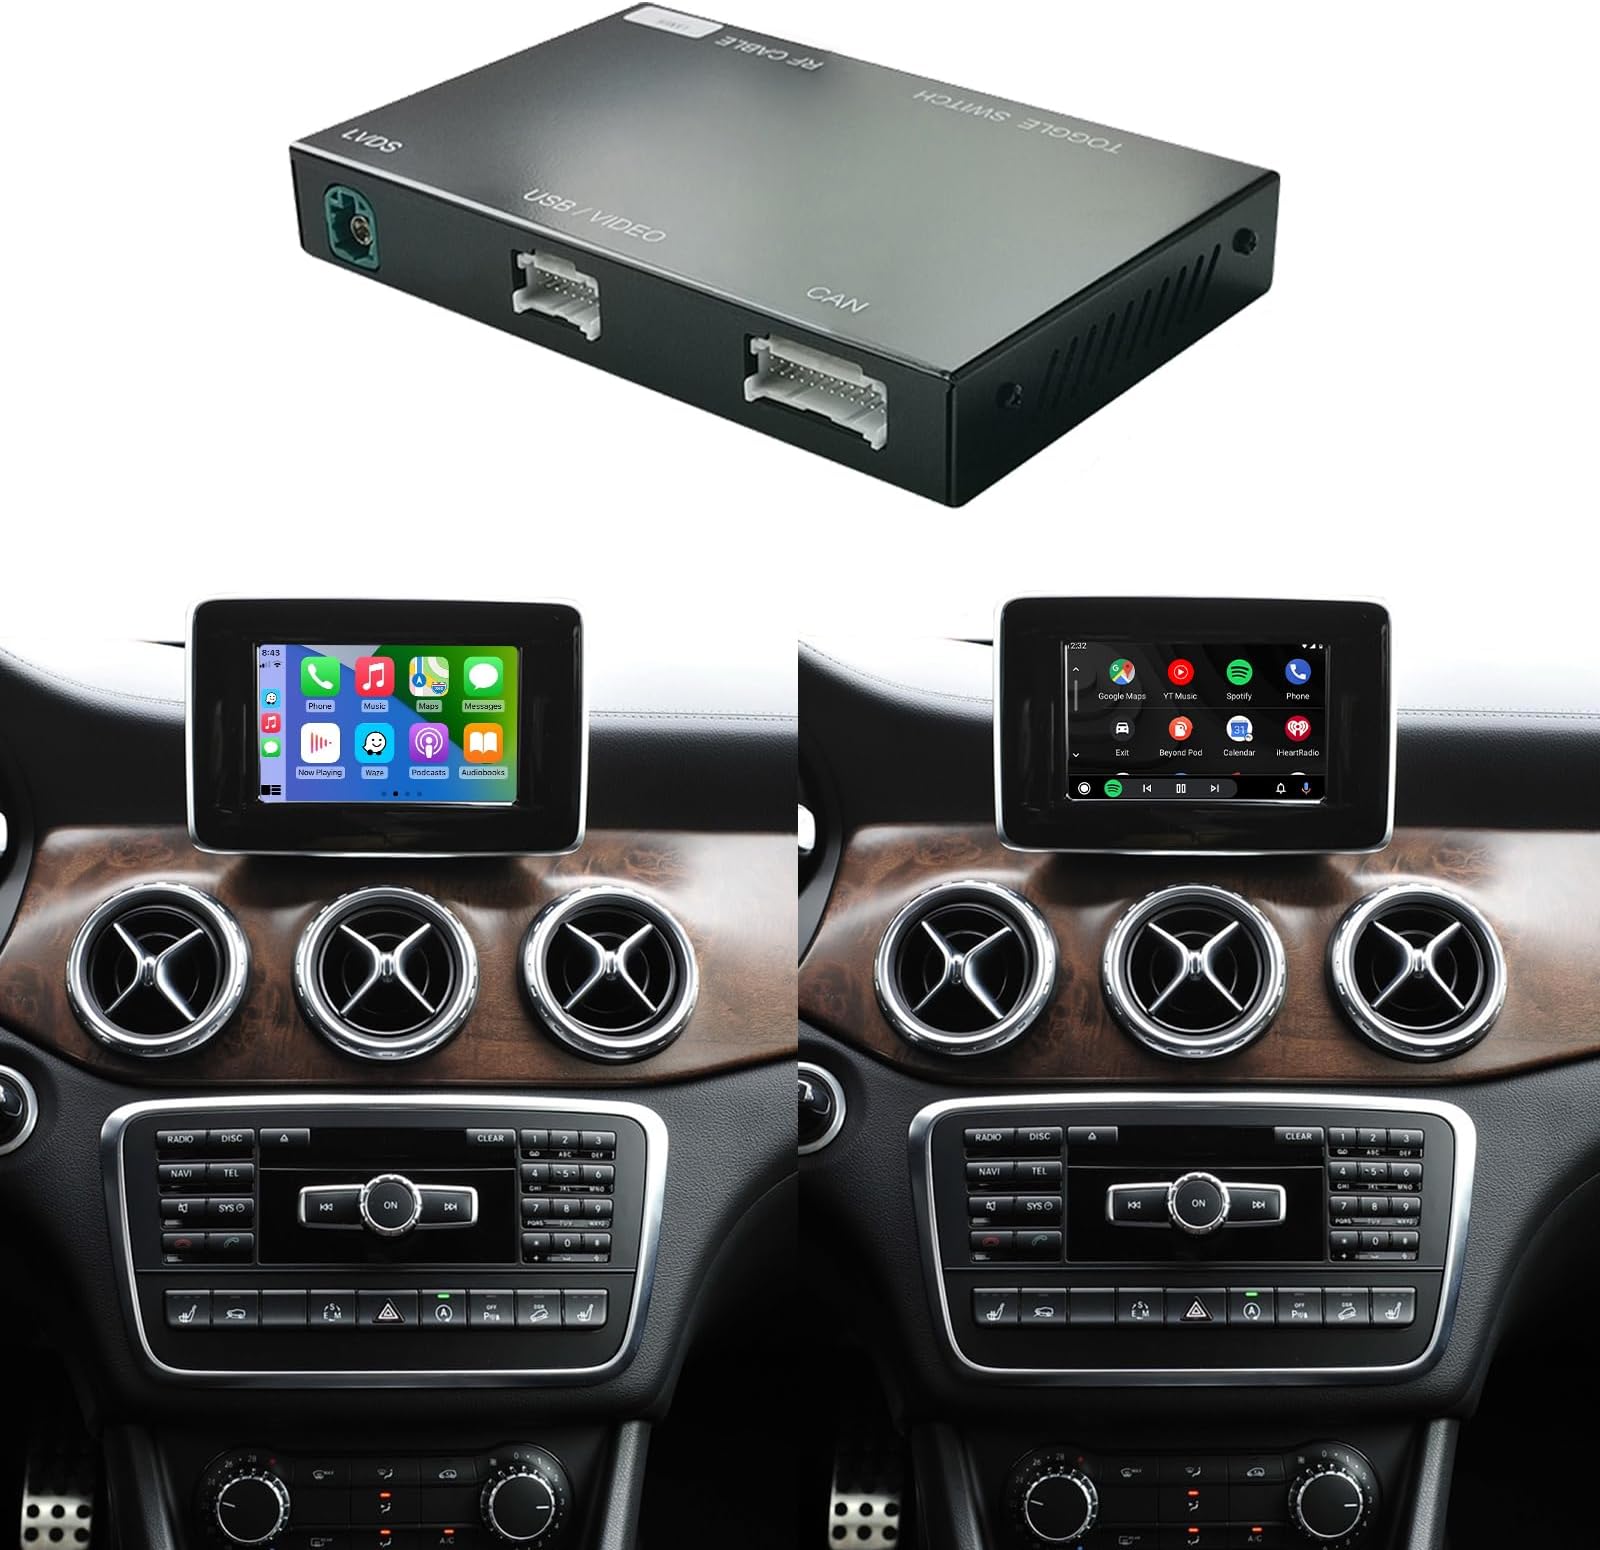
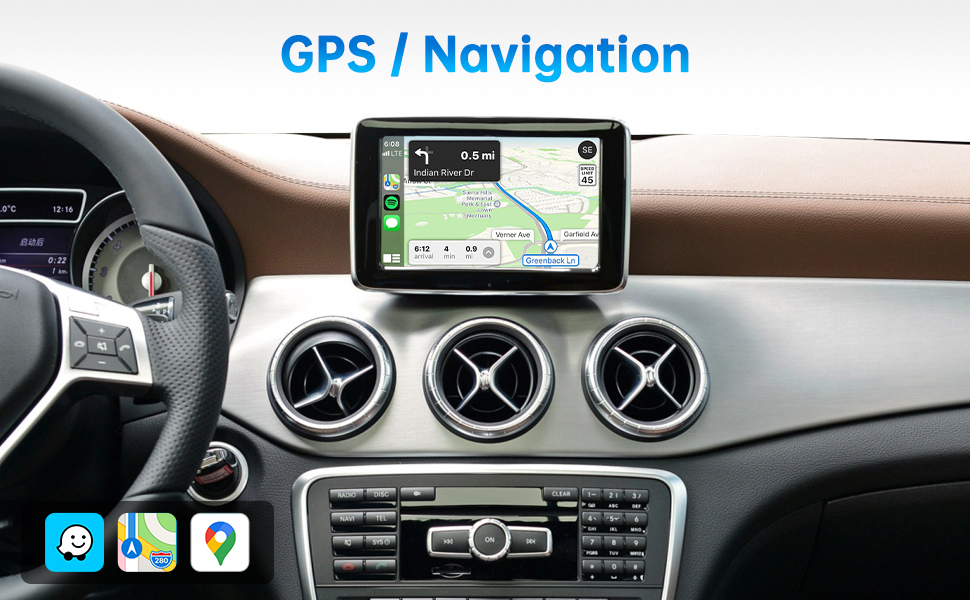
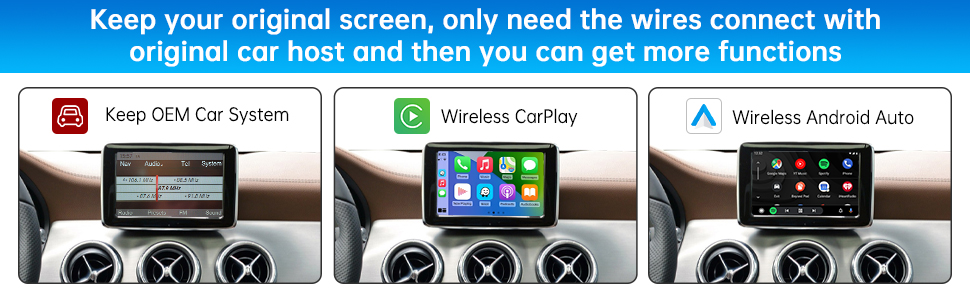
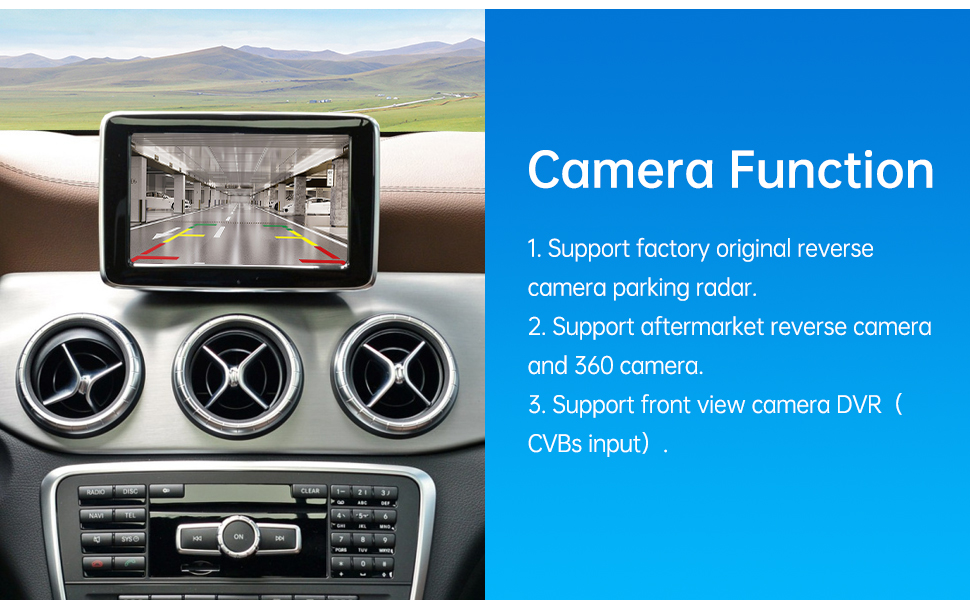
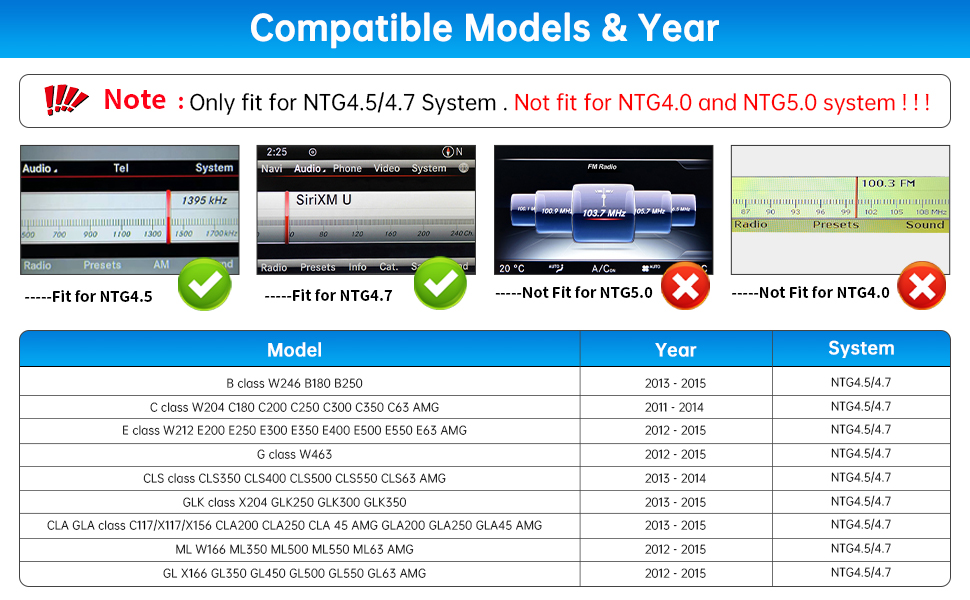
The Road Top Wireless CarPlay Interface Decoder is a premium retrofit module designed exclusively for Mercedes-Benz NTG4.5/4.7 systems (2012-2015 C/E/GLK/ML/CLA/GLA/CLS/SLK). It enables wireless CarPlay, Android Auto, and MirrorLink connectivity while preserving full OEM controls and compatibility with factory and aftermarket cameras. Requires AUX audio output and offers expert installation support, transforming your classic Mercedes infotainment into a modern smart cockpit.


| ASIN | B084LZL126 |
| Audio Output Mode | Stereo |
| Audio Output Type | RCA, Speakers |
| Best Sellers Rank | #170,442 in Electronics ( See Top 100 in Electronics ) #4,207 in Car In-Dash Navigation GPS Units |
| Brand | Road Top |
| Built-In Media | carplay box |
| Compatible Devices | Smartphone |
| Connectivity Technology | Bluetooth |
| Connector Type | USB |
| Control Method | Voice |
| Controller Type | Android |
| Customer Reviews | 3.5 out of 5 stars 109 Reviews |
| Format | 4K, Dolby |
| Manufacturer | Road Top |
| Mfr Part Number | Carplay-mbntg4 |
| Model Number | 32a04258-c120-45c8-81b1-ef4061c255a1 |
| Number of Channels | 4 |
| Other Special Features of the Product | Built-In Bluetooth |
| Output Power | 45 watts |
| Output Wattage | 45 watts |
| Special Feature | Built-In Bluetooth |
| Supported Internet Services | YouTube |
| Surround Sound Channel Configuration | 4.1 |
| UPC | 763684288682 |
| Wireless Technology | Bluetooth |
J**S
Makes your early 201x MB new again
This will allow you to have modern Apple/Android functionality on your legacy stereo. Sharing install experiences for others (I have a 2013 E350, other 1st generation E-class models should be similar). I'm in the USA, so I have a LHD car, not sure if this works out for RHD cars. Before you forget, go ahead and set the DIP switches according to the manual. You will need to know if you have the 5.8" or 7" screen, set the switches per the instructions, depending on what screen you have. Also go ahead and attach the two black ground wires together (one from the main harness and the other from the USB harness). You won't get audio if you don't do this, and it's much easier to take care of it beforehand. You'll need to remove the LCD, center vent trim, the radio, the heater controller, the sliding cover/cup holder, and the control knob. Plenty of videos on YT for that. I highly recommend temporarily plugging everything in outside the dashboard, to make sure it all works correctly. If you do this, go ahead and put the center vent trim in position (don't lock it in, just rest it there) and plug in the switches, or else the car will throw errors about a hazard flasher malfunction since it can't find the hazard switch. Don't forget to move the fiber over from the original Quadlock connector to the Quadlock in the harness. The release clip is tiny, it's in the top of the connector. Once you release that the two fibers come out in a black connector. Don't try to take out the individual fibers. Be careful, these are plastic fiber, not as fragile as a glass cable, but still can be easily broken if roughly handled. Once you're sure it's working then take everything back apart and start actually installing it. Here are the best ways I found to route things on my car. I located the control box behind the LCD. That is the only decent place I found that had enough room and allowed the cables to reach. Now starting from the radio cavity, thread the wifi antenna connector, and the white connectors from the two harnesses, past the vent flanges, on the left side. Tuck the wires behind the vent flange on the left side. Take the LVDS cable and run it down the right side the same way. Think of it like a V, the bottom of the V goes to the control box and the two tails stay in the radio cavity. Plug the cables into the control box, working inside the monitor cavity. Now place the control box in position behind the LCD. I had the white connector end pointed down and wifi antenna connector pointing up. It was able to tuck into a recess that extended toward the passenger side. I took a big zip tie and was able to secure the control box to a metal support behind the LCD. Plug the factory cables (LVDS and black power connector) back into the LCD and reinstall it and put the bezel back on. Now the fun part. You have to extend 2 cables to the arm rest. One for your USB and the other for the audio. Route the USB and 3.5 mm cables down past the heater control area and into the space where the cup holder goes. Follow the harness right down the center of the cup holder area to avoid interference with the cup holder. The framework that holds the control knob needs to be unscrewed (4 T20 screws) and then pull up the front end (2 clamps at the front right and left corners. Once you do that you will see a small notch at the front of the armrest compartment. There is just enough clearance to route your audio cable and either your lightning cable or USB extension through this notch and close the framework back up. Wiggle the cords to make sure they're not pinched. I left the end of the lightning cable in the armrest compartment. The red protective cover that went over the Wi-fi antenna connector is the right size to slip over the end of the cable and prevent it from shorting out inside the compartment. You won't need this USB cable except if you want to run a wired connection. (see below, I ended up running a USB extension to get the actual USB connection in the armrest cubby to allow firmware flashes) The audio connects to the adapter that plugs into the MHI port in the back of the armrest compartment. You'll need a ground loop isolator, (item ID B019FC6ZQQ) or else you will get whining noises in the audio. Put the control knob and cup holder assembly back in. Don't forget to throw a towel back over this to prevent scratching the wood. Take the wi-fi antenna and route it down to the heater control area. There is a horizontal flat spot in the structure behind the heat controls that works great to secure the antenna. Reinstall the heater controls. Now all that is left is to plug the connections back into the radio and work it back into the opening. This takes a little bit of patience. The best place for the factory Quadlock is down low behind the heater controls. You may have to put the radio in part way and reach through the vent opening and down behind the radio to help get things where they need to go to allow the radio to seat flush. Don't force it, if it won't set in easy, you are pinching something. Put your vent back in and you're done except for some programming. If you don't want the factory MB voice (who does?) then go into Engineering Mode on the head unit (press and hold 'end call' + '1' + '#' buttons for 10 seconds). Navigate (using the console knob) to menu 7.7 (HU Parameter), then scroll down to find SDS/TTS in the list. Select this and choose Disable. Now hit the Back button until you're back at the root menu, then find menu 9 (Reset) and run this. It does not factory default the HU, this just reboots the unit. This is necessary to make it accept the changes. **new content 4 April 2022, after living with it for a month or so...** I was having problems with it connecting and staying connected. Turns out you have to be within about a foot of the wifi antenna for wireless CarPlay to work effectively (or maybe it's just where I mounted the wifi antenna, above the climate controls). If I leave my phone on the belt clip on my left side (in a USA LHD car) it had a hard time connecting. Once I realized this and put the phone in the cup holder or center console it works flawlessly. If I get motivated enough to pull the radio out again I may try moving the antenna but that's a big job, vs just taking the phone off my belt and putting it in the cup holder/arm rest cubby. Go ahead and get a short (2 ft) USB 2.0 extension, you will want the USB port extended out to the armrest cubby so you can flash the firmware if needed. Be sure to use a USB 2.0 cable, the USB 3.0 cables are too fat and you don't need the extra USB 3.0 wires anyway. If your head unit doesn't have the AUX as one of the audio choices then go into engineering mode and look for the menu to enable it. Be sure to do the 9. Reset afterward or it won't accept the changes.
M**G
Installation Instructions Vague, Doesnt Consistently Work
I was able to figure out how to install this with a friend. The instructions that it comes with are not too clear but we were able to figure it out. After installing it, it seemed to work fine. BUT a week later it doesnt work every time I turn the car on. I noticed on hotter days that it does not switch to carplay and instead I get a black screen. I would un-install this but it took almost 4 hours to install and unintalling it would require removing a lot of interior panels again.
M**.
Functions as described, but NIGHTMARE to install. Borderline not worth the stress.
Device works and functions as described. I opted to not hardwire the audio as you can use it with your factory bluetooth audo, and that simplifies install. I have only two complaints keeping it from being 5 stars. First, and the biggest one, this is a NIGHTMARE to install. Every video online, including the one from the manufacturer, skips over the hardest part, which is reassembling everything with the added bulk of the new wiring harnesses. The harness provided to connnect the back of the factory radio is way too short, making tucking it somwhere that it does not get in the way next to impossible. I am a 4x ASE master mechanic, and do this for a living, and this still took me about 3 hours. You 100% need to remove the entire glovebox and lower kick panel on the passenger side to have any hope of finding a good place to put the box. Please, do yourself a huge favor and TEST EVERYTHING before putting it back together. This will take you hours to get back together, and if it doesnt work you will want to just give up. My other issue was with the manual. My display was listed in the manual as 5 inch, but its actually 7, so it did not work at first due to the dip switches being in the wrong setting. That is an easy fix, but I did not figure it out for almost 4 days, and support from the seller is very slow to respond. They were helpful, and figured out my issue, but my interior was disassembled waiting for a response from them for 3 days, and I had to use my other car to get to work. At the end of the day, I'm happy I got it, I'm happy with how it works so far, but I would not install another one of these for anything under $1000. That was the biggest nightmare I've had in a while, and I would 100% not recommend it to a novice or someone who does not have at least a little experience with running wires and interior disassembly, as the interior of your car needs to come apart WAYYYYY more than you would initially think.
C**Y
Fantastic upgrade for the price! My GLA250 feels so much better appointed now!
I purchased my 2015 GLA 250 CPO as a bare-bones (no options) well-priced entry point for Mercedes. But, I quickly learned that I needed a backup camera and the so-called "infotainment system" was not very good at providing info (nor entertainment)! (NTG 4.5) I had no navigation, no backup camera, pretty much nothing but a radio and an input for an iPod. It left me using my Android phone for pretty much everything and nothing was integrated with the car. I purchased this unit and I must admit it took me something like a week to install. Granted, I didn't need the car for the week and it was 95 degrees in the shade sometimes, so I didn't spend a lot of time on it each day. But, this installation is not for the faint of heart. It is actually very simple in terms of connections, but taking your Mercedes apart can be tedious and scary. I would watch YouTube videos for different types of installations showing how the different parts of the car were put together, and carefully do one section at a time until I had my entire dash and tailgate carefully disassembled. It was a frightening sight but it all went back together beautifully! I added two cameras: a front camera in the emblem and a rear camera in the rear hatch-latch (each purchased on Amazon for under $40). These work GREAT! When I shift into reverse, the rear view pops up on the screen and when I shift into drive it switches to the front camera for 10 seconds. This is absolutely awesome for parallel-parking in tight spaces. I am having some trouble with connecting to Android Auto; it only seems to work 1 in 3 times or so. But, I have come to realize it is my phone because my husband's phone (we both have Moto Z3s) connects every time. I might reset or replace my phone sometime soon because I expect that will resolve itself with a change of phones. My phone has been acting weirdly in other ways lately, so I am pretty sure something is messed up with my phone. There are two options I wish this unit had in order to make it absolutely perfect: 1. an interface to an OBD2 scanner. Android Auto has no app for that (DUH??) so it would be nice if I could view my real-time dash information on the unit (notice in my photo I have my phone mounted below the stock screen, running Torque Pro). 2. an add-on inline DVR that could record images from the camera. Like, a pass-thru RCA in/out that captures the camera feed as it goes through the unit. That would turn my front camera into a "dash" cam but very unobtrusively. I cannot imagine such a thing doesn't already exist, but I haven't been able to find anything that will do that. The manufacturer points out that they support dashcam standards, but I'm looking not to use my dashcam as the camera feed, but the camera feed as my dash cam. Hope that makes sense. Both these features would be really nice to have, but this thing is an awesome upgrade as it is already. I got what was probably $1200 worth of functionality for $300 (plus a bunch of sweat & swearing). The instructions were perfectly adequate for what needed to be done. I never needed any support so I cannot comment on that. Overall, I am thrilled!
A**T
Fantastic unit works very well. Update review after a few months
Updated review, Update month 5. Okay, having lived with the unit for over 4 months+ I have come to the solid conclusion to remove the unit and returning to factory. I started having too many ghost issues. For what ever the reason this unit has had an effect on the modules it is connected too. Scan after scan I would reset codes only to have them return. After removing the unit everything went away. Not sure what to say other than nothing wrong with using the Bluetooth.. Update month 2: The unit is draining the battery of the car when the vehicle is rested for a few weeks. After running circuit by circuit tests we found this unit does not fully shut down and had instances where after the vehicle has set over night the box would be very hot from the heat generated from inside overnight processing. For me this unit is coming out of the car. Shame. It was working quite nicely. I reached out to those folks and never got a response. Another Chinese electronic. Rebranded….for all I know it was back dooring my network…. 1st review: The install is a bit advanced. Having an above normal mechanical and electrical aptitude this was a two hour project. There is a lot going on with this system. Had to play with the DIP switches to get the screen to work. After figuring this out it worked flawlessly. I do recommend tying the grounds together shown as optional on the can bus leads. Absolutely love this. I now enjoy Car play. Great addition. Good product.
A**8
Transformed My 2014 SL550
After watching several excellent videos on removing the Command module (audio/navigation) from the center console of my 2014 Mercedes SL550 (R231), the installation was straightforward and hassle-free. This aftermarket CarPlay solution performs better than the factory CarPlay in my Honda Pilot. I've experienced zero issues: the sound quality is noticeably superior to the stock system, and everything functions exactly as expected. Even though my SL is over 10 years old, it feels thoroughly modern in every respect—except for the original audio and navigation system. Adding CarPlay transforms the car, bringing it fully up to date, and represents incredible value for the money. Roadtop's customer support is extremely responsive, just as many others have reported on forums like mbworld.com.
L**N
Great when it works, but has connection issues nearly every time I use it
I have to “forget Bluetooth device” almost every time I start this system up and re-add it to CarPlay, and it rarely automatically opens. I don’t know whether I got a dud but it’s extremely frustrating. When CarPlay does work though, it’s pretty smooth and a good experience.
J**T
Customer service is AWOL
The short story is customer service might have an firmware update that could fix my problem, they however are uncontactable. The long story. I finally got time to install this system in a 14 Mercedes Benz E350. Install instructions arnt the best, however is very doable. My problem is after installing my screen doesn't turn on. I spent far too long troubleshooting and no fix. Contacted Amazon and they gave me a email for to contact the seller. I never got a response. Found them on Facebook that links you to Whatsapp, that I had to install. Only for them to tell me that they are a different seller and won't help. Found multiple other " sellers " that aren't the Amazon one that again won't help. After digging through forums online I was able to find multiple people with my exact issue. The ones that were able to get it to work was a firmware update that they were only able to get after contacting the seller. Any other company I've ever seen has their updates on their primary website. This one doesn't. Anyone want to buy this brick?
A**H
Satisfaction
Fonctionne bien pour le moment, par contre pas réussi à installer avec l’auxiliaire. On a du synchroniser avec le Bluetooth de la voiture
G**M
Recién instalado en MB C200 w204
Es un producto cuyo empaque y unboxing es una buena experiencia. El manual cuenta con la información suficiente para hacer una correcta instalación. Solo recomiendo ampliamente que tambien busquen videos de youtube, sobre todo para desarmar las ventilas de aire y la radio. Si es obligatorio contar con herramientas plásticas para no dañar el tablero y sobre todo los seguros de las ventilas; se requieren unos ganchos para poderlos desasegurar. Tambien desarmadores o matraca con puntas T20 porque los van a necesitar una lámpara o tu cel para iluminar y mucha, mucha paciencia para instalarlo. Desarmar el embellecedor con las salidas de aire, contando con las herramientas adecuadas, no es tan complejo, pero si de calma. Una vez retirados, la radio cuenta con unos tornillos T20 en la parte superior. Habrá que quitarlos. Una vez realizado se bajan los seguros y queda libre. Cuidado, hay unos cables a la derecha de la radio que debemos desconectar antes de jalarlo. Debemos mover la palanca de velocidad para poder retirar la consola. Se puede hacer encendiendo el auto y moviendo la palanca o sin arrancarlo botando con cuidado la cubierta de piel con la lengüeta que desatora la palanca (ver videos de ejemplos o el manual). Una vez retirado la radio, saquen foto de como estan acomodados los cables, por si requieren ponerlo como estaba original y empezar a hacer los pasos y conectar todo como lo indica el manual. Considera de una vez donde vas a acomodar el modulo negro ya que sinceramente el espacio que ofrece el MB w204 es nulo y va a ser una verdadera pesadilla a la hora de volver a colocar la radio en su lugar. Personalmente decidí dejarlo afuera y colocarlo debajo de la guantera, en la cubierta inferior que oculta el filtro de polen, pegado con velcro de alta resistencia y practicamente pasa desapercibido. Además, si existiera algun problema, que los vas a tener al principio, habra que desconectar y conectar de nuevo, o si en un futuro instalas una camara frontal o un aparato con hdmi, como una dash cam u otra cosa, será mas fácil instalarlo con el modulo disponible a tener que volver a desarmar todo de nuevo. Ni de broma lo recomiendo y ni se puede. La conexión del cableado es relativamente fácil, solo con cuidado de la fibra optica. El arnés que conecta los cables originales del auto es muy engorroso y complejo de acomodar en su multicontacto y a la hora de reinstalar todo, por lo que es mejor colocarlo por debajo de las guías inferiores de la radio. Y sacar los cables que se conectarán al modulo negro. Antes de armar todo pruebenlo, porque al principio presentó fallas, como pantallas negras y sin sonido. Esto último se arregló conectando los cables de grnd, según el manual, de los arneses. El cable de la antena WiFi la puse en el piso de la consola central perfectamente oculto y la antena la pegué a lado del asiento del copiloto, en la consola central... muy limpio y discreto. Lo mismo con el cable AMI, muy discreto y lo oculté con la pieza de las ventilas traseras. La configuración fue rápida, pero tuve que desconectar el modulo como cuatro veces porque la pantalla se puso negra por completo y dejó de funcionar, también ocurrió que la radio no se apagaba porque el teléfono seguía conectado con el bluetooth y android auto. Como dije, se requiere mucha paciencia y tambien objetividad. Lo mas complejo de todo fue volver a montar la radio, la caja con la multiconexión del modulo negro estorba mucho y hay que probar acomodarlo por debajo del espacio de la radio y con una presión controlada. Creeme, una vez que lo lograste reinstalar ¡Jamás querras volverlo a desarmar! Lo único que me falta resolver es que el control por voz de google funcione con Android Auto, ya que la voz original del auto me indica que las ordenes realizadas por google android "No son validas" y este no se oye. Ya funciona por el momento la interfaz visual de android auto, su activación automática al encender el auto, inicio de música automáticamente, spotify, samsung player, youtube, waze, llamadas telefónicas y la cámara de reversa. Veré en los próximos días como funciona y les comento. ACTUALIZACIÓN 11/11/2022 El aparato sigue teniendo el problema de que a pesar que se escucha que se activa y el teléfono se conecta inalámbricamente, no envía señal de video al monitor del auto. Solo dejo de usar el auto por dos días y ocurre esto. Se ha solucionado de forma parcial desconectando los cables CAN, pero vuelve a fallar. Ya envié un mensaje de whatsapp al fabricante para que me de soporte técnico. Si no me responde pronto tendré que optar por devolverlo, teniendo que desarmarlo. Lo molesto es que no entre de forma normal y simplemente la pantalla se pone en negro. Actualización 14/11/22 Recomiendo ampliamente que antes de encender el auto, primero desbloqueen su teléfono y así se garantiza que entre se emparejen este y el kit. Hasta el momento eso es lo que mejor ha funcionado. Actualización 18/11/22 Producto con defecto en interfaz de video, ahora la falla es permanente, simplemente no hay video. Y nadie de la compañía responde, ni servicio técnico ni nada. Voy a proceder a desarmar todo de nuevo y devolverlo. No lo recomiendo.
S**Z
Pues de mala calidad
Se desconecta de repente y hay que volver a enlazar el vendedor pide la devolución pero me cuesta $3,000 quitarlo y más lo que cuesta ponerlo y el costo del aparato pues ya no sale la devolución l, pedí que me lo actualizara o algo para evitar se desconecte y no tengo respuesta
Trustpilot
3 weeks ago
1 month ago