Desert Online General Trading LLC
Dubai, United Arab Emirates
Desert Online General Trading LLC
Dubai, United Arab Emirates


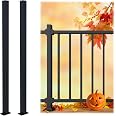
🖤 Elevate Every Step with Strength and Style
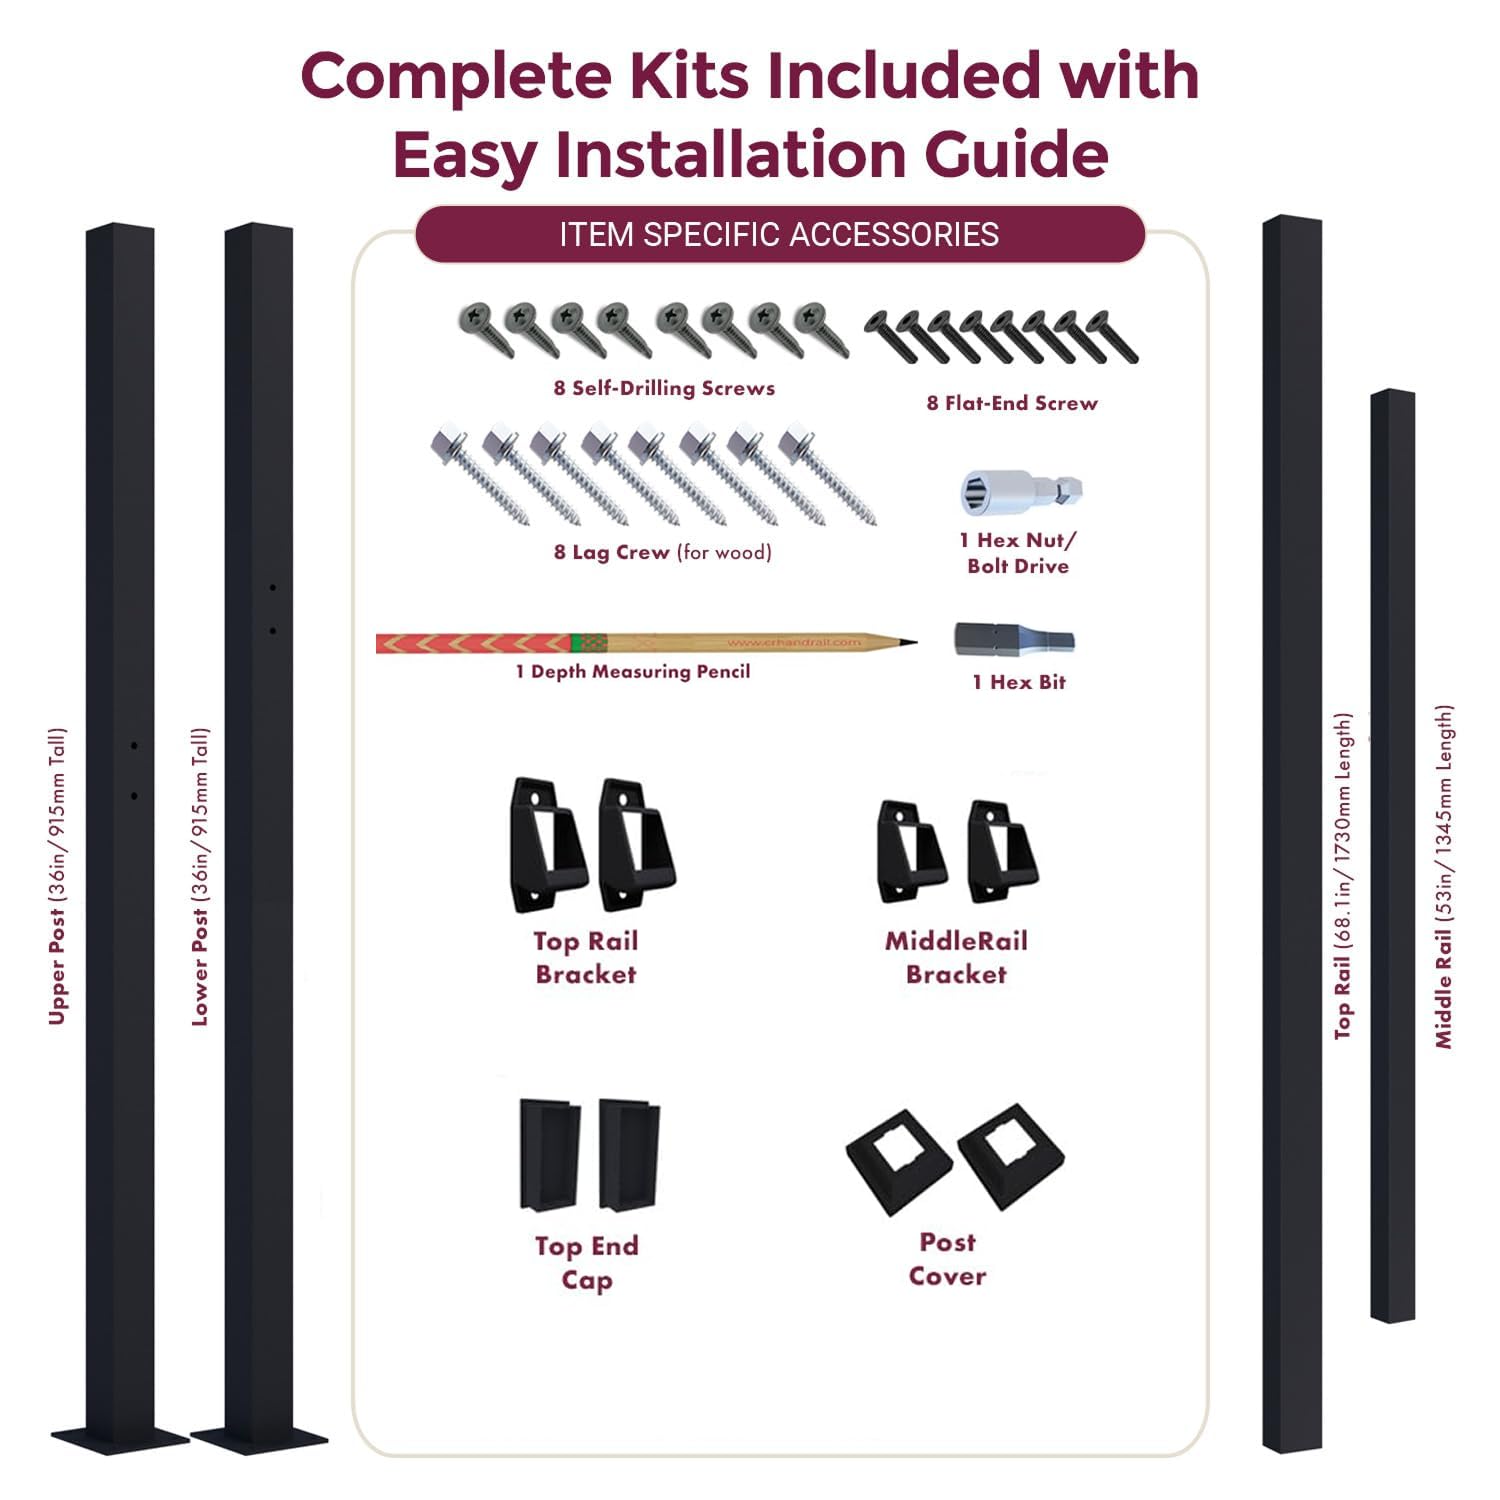
The CHR Fence & Rail Hand Rails kit offers a robust, powder-coated carbon steel railing solution designed for both indoor and outdoor stairs. Tested to hold 238 lbs per post, it features a modular design that connects multiple kits without welding, making it ideal for residential and commercial use. With a sleek matte black finish and included installation hardware, it combines durability, style, and convenience for safer, more elegant stairways.
| Brand | CHR |
| Material | Metal |
| Color | Black |
| Item Weight | 7.71 Kilograms |
| Product Dimensions | 68"L x 36"W |
| Finish Type | Powder Coated |
| Weight capacity | Minimum weight: 238 Pounds |
| Manufacturer | CR Home |
| UPC | 810062150649 |
| Part Number | CRHR4 |
| Item Weight | 16.96 pounds |
| Item model number | CRHR4 |
| Size | 5 Steps Handrail |
| Finish | Powder Coated |
| Item Package Quantity | 1 |
| Maximum Weight Capacity | 476 Pounds |
| Included Components | Drill Bits |
| Batteries Included? | No |
| Batteries Required? | No |
D**.
Terrific railing that comes with everything you need!
This is a terrific product - it comes with everything you need to get the job done, minus the electric drill! All the parts are there, great instructions, plus drill bits and even a drill bit extender. Installation is easy and it is nice and solid once installed. The price is also excellent. One tiny negative - the railing itself is squared and not "comfortable" to grip like a more rounded railing might be. But that is a small issue, especially given the price point and the overall quality of the entire package. Highly recommend!
R**W
Sturdy and looks good. Adjustable angle
This is a high quality product. Used it for the garage which has 3 steps.holds strongly ( I screwed it into the wood steps)they give you everything you need, including an extension for the drill (which you will need as the floor bolts are close to the post and the drill bulk will be too close to the post without it. there are also concrete bolts and a mason bit included.WATCH the installation video. pretty simple but for those not familiar the brackets must be mounted a certain way.Only thig I changed was using my own drill bit for the screws as theirs will take longer to drill the holes.(not pre drilled because you can adjust the angle based on tread.and riser height)expected construction time is 60 minutes. I you are familiar with tools, make that 45.
N**D
I'm buying another one.
This is a very cost effective, study, supposedly USA made railing. Nothing fancy here, just functionality. This comes with EVERYTHING you need to install except a drill and hammer and wrench. I installed into cement stairs. Pros: Sturdy, simple, easy to assemble, good instructions, all needed bolts for wood or masonry, drill bits for wood and masonry, ruler, pencil/depth gauge, etc. Cons: the drill bit for masonry, while included, is poor quality. I resorted to one of my Milwaukee masonry bits in 5/16 and it made drilling much more efficient and quick. I found the instructions for depth of hole in masonry short. I think you can go 2.75 inches, not 2.5. I had to cut my bolts down after even though I followed the drill depth as instructed. Don't follow the tip for putting nuts on the bolts when you hammer into cement,that just messed up the nuts and threads. The bolts are designed to take hammer whacks without peening over and if you drill proper hole size and depth you'll be fine That's my experience. Lesson learned: take your time, mark your holes BUT, decide which post you will put in first, drill those holes and mount your first upright, then reassemble and check your hole markings for last upright. I'll bet you will need to adjust hole markings to keep railings snug and tight on last upright. All in all I am buying at least one more, maybe two. Seems like a good company and a good product. Time will tell.
S**R
CR Handrail Review
Easy to assemble with excellent hardware, tools and instructions provided to complete this task. Installed handrail is sturdy and black powder coat is durable and applied with consistent appearance. Gave four stars only because one of the top rails was missing a threaded insert. I bought a replacement insert at the local hardware store. Excellent value for the price and quality.
B**F
High quality and very sturdy
This railing far exceeded my expectations. It has a quality look that would lead you to believe that it costs at least twice as much. Installation was pretty straightforward, aside from the issues with some rotten concrete on the bottom. The next step will be to replace the rotten concrete to make the installation even safer. Very happy with the product.
A**K
Concrete Installation Worked Well for Lady DIYer with SDS Hammer Drill
The media could not be loaded. I purchased the two-step railing to install on a concrete step and floor from my garage into my home, to provide stability and assistance for my husband who has mobility issues. I'm a 50-something woman who isn't afraid of home improvement challenges, having completed many DIY projects around my home using various manual and power tools. I also consult YouTube videos on the tools I'm using and/or the project when available. I watched CHR's video about installing a railing into concrete before starting this railing installation and found it helpful.To get started I unboxed and checked all the included parts. I found one of the posts with the holes to secure it to the ground had holes that were not evenly spaced and too close to the outer edge. I scanned the included card to text the company, sending them photos of the issue. They responded within 20 minutes (on a Friday at 7pm, and asked for my order number, name, and mailing address. They double-checked with me about which part it was, then I received notification the part had shipped - free of charge. It arrived 4 business days later.NOTE: I ran into one other issue, but was able to fix it myself. As shown in the photos, one of the screws had a smaller screw caught sideways in the part where the bit needed to go. I couldn't use the screw until I got it out with a small screwdriver (for eyeglasses repair). I wedged the small screwdriver underneath the screw and popped it out so I could use it. Frustrating, but not a deal breaker.Put together the railing on a soft surface to avoid scratching it. The only thing you need is a drill, as the company includes all of the parts you need including a drill bit for the included screws.Attach the brackets as shown in the included instructions. The company also has a video you can watch. The top raid and the middle railing will not be screwed into place until the end of your installation.Prepare your tools and area of installation. NOTE: Don't install the railing any closer than 1.5" to the edge of a step to prevent cracking or breaking of concrete.FYI: After reading the reviews I decided to purchase an SDS hammer drill. I have a regular drill and an impact drill with hammer functionality, but after watching the CHR video and noticing how hard the installer had to push on the drill to get it to go through the concrete, I wanted the best tool for the job out of concern for breaking the bit and/or hurting myself. I also picked up SDS-Plus carbide drill bits to use.Installing this rail took me 90 minutes. I had made sure to have my tools ready, cleared space around it before starting, and had already put the rail together (brackets on).The most time-consuming part was drilling the holes, and that was the part I was most nervous about getting right and not hurting myself. Hammering in the sleeve anchors was a little concerning as some reviewers said they had bent or broken them. I just took my time and made no wild swings, just slow, steady smacks on the head of the screw with the nut at the top of the screw to give me more to hit. As the anchors opened I was able to hear a difference in my hammering as well as feel it becoming more difficult to move the bolt.After the railing was up and over the bolts I hand tightened the nuts down and made sure the top and mid railings were where I wanted them to be. I then used an adjustable wrench to further cinch down the nuts on the bolts holding the rail to the step and floor of the garage. There is an included drill attachment for that purpose, but having left the bolts just a smidge too tall, I couldn't effectively use it. This worked fine.The last part of the installation was using the included metal screws with the included bit to secure the top and mid rail. I learned that I needed my drill's chuck at a high setting to have the drill go through metal with these screws, but once I did that it worked great.Adding the plastic end caps on the top rail and the plastic cover for the bolts at the base of each post is the last thing to do. I know it was a cost-cutting measure, but it would have been nice to have had these pieces metal too. Considering all that they give you in the installation kit, I really shouldn't complain!This is a great kit for a DIYer to add a rail to wood or concrete steps. I'm impressed by CHR's commitment to their customers in both the way they responded to my parts concern and in the way they educate their customers with included directions and video tutorials. I would not hesitate to buy another kit from them and highly recommend this one to others.============================MY SUGGESTED ITEMS FOR INSTALLATION IN CONCRETE:1. Eye protection. Little bits of concrete flew into my face when drilling.2. Gloves. Nothing heavy-duty needed; nitrile for grip.3. Sharpie pen. Ideal for marking holes for drilling. Pencil is included.4. ShopVac or vacuum. To suck out powdery concrete after drilling hole. You can also use compressed air.5. Hammer Drill or SDS Drill. Don't expect a regular drill to get through concrete.6. 5/16 Drill Bit for Concrete; SDS-PLUS for an SDS drill.7. ** If using a SDS drill have a regular or impact drill available to attach screws and tighten nuts.8. Adustable wrench; if you haven't hammered your sleeve anchors in enough, the included bit may not go down far enough to tighten nuts on the sleeve anchors.9. Tape measure; there is a ruler included, but it's clear and tough to see.10. Hammer for pounding the sleeve anchors into the holes with the suggested depth of 2 1/2"; shown on the pencil.11. Ear protection; for me the drill is loud.1st TIP: Drill one hole for the lower post, vacuum it out, check the depth (2 1/2" is suggested) and install an included sleeve anchor in the hole. Take care to hammer straight into the hole and listen for the anchor to grab into the concrete. Leave 3/4" of the bolt above ground level. Slide the post over it and remark your holes if needed. Drill the other three holes for the lower post and install the sleeve anchors. Slide the lower post over the bolts. Reposition the upper post if needed and make sure the top rail and middle rail are secure within their brackets before remarking the upper holes and drilling them.2nd TIP: Use a 5/16 concrete drill bit (included, but you may want to get another one) to drill all four holes slowly, perpendicular to the floor, letting the weight of the drill (SDS hammer type for me) with a fresh bit specifically for concrete do most of the work. DO NOT make a larger hole as some have suggested as the sleeve anchors won't grip as well. You can use the 5/16 bit and hammer in the included anchors for a secure fit.3rd TIP: Vacuum up the concrete dust and suck it up out of the holes before hammering in the sleeve anchors. This is very important as the dust can compact in the hole, changing the depth, and making it tough for the anchor to bite.
J**E
Very sturdy, easy to install, looks great
Very sturdy, looks great, they even supply to tools to install like proper drill bit sizes and torn. Only issue is during install my drill would lock up due to the insufficient clearance for the drill body. The bolts all need to be drill body accessible.
T**K
Good quality parts
Excellent quality parts. All the parts required to install are included with the railing, even 2 drill bits, 1 bit extender, and drill bits for the screws . Good simple directions are also included.