
下载应用程序


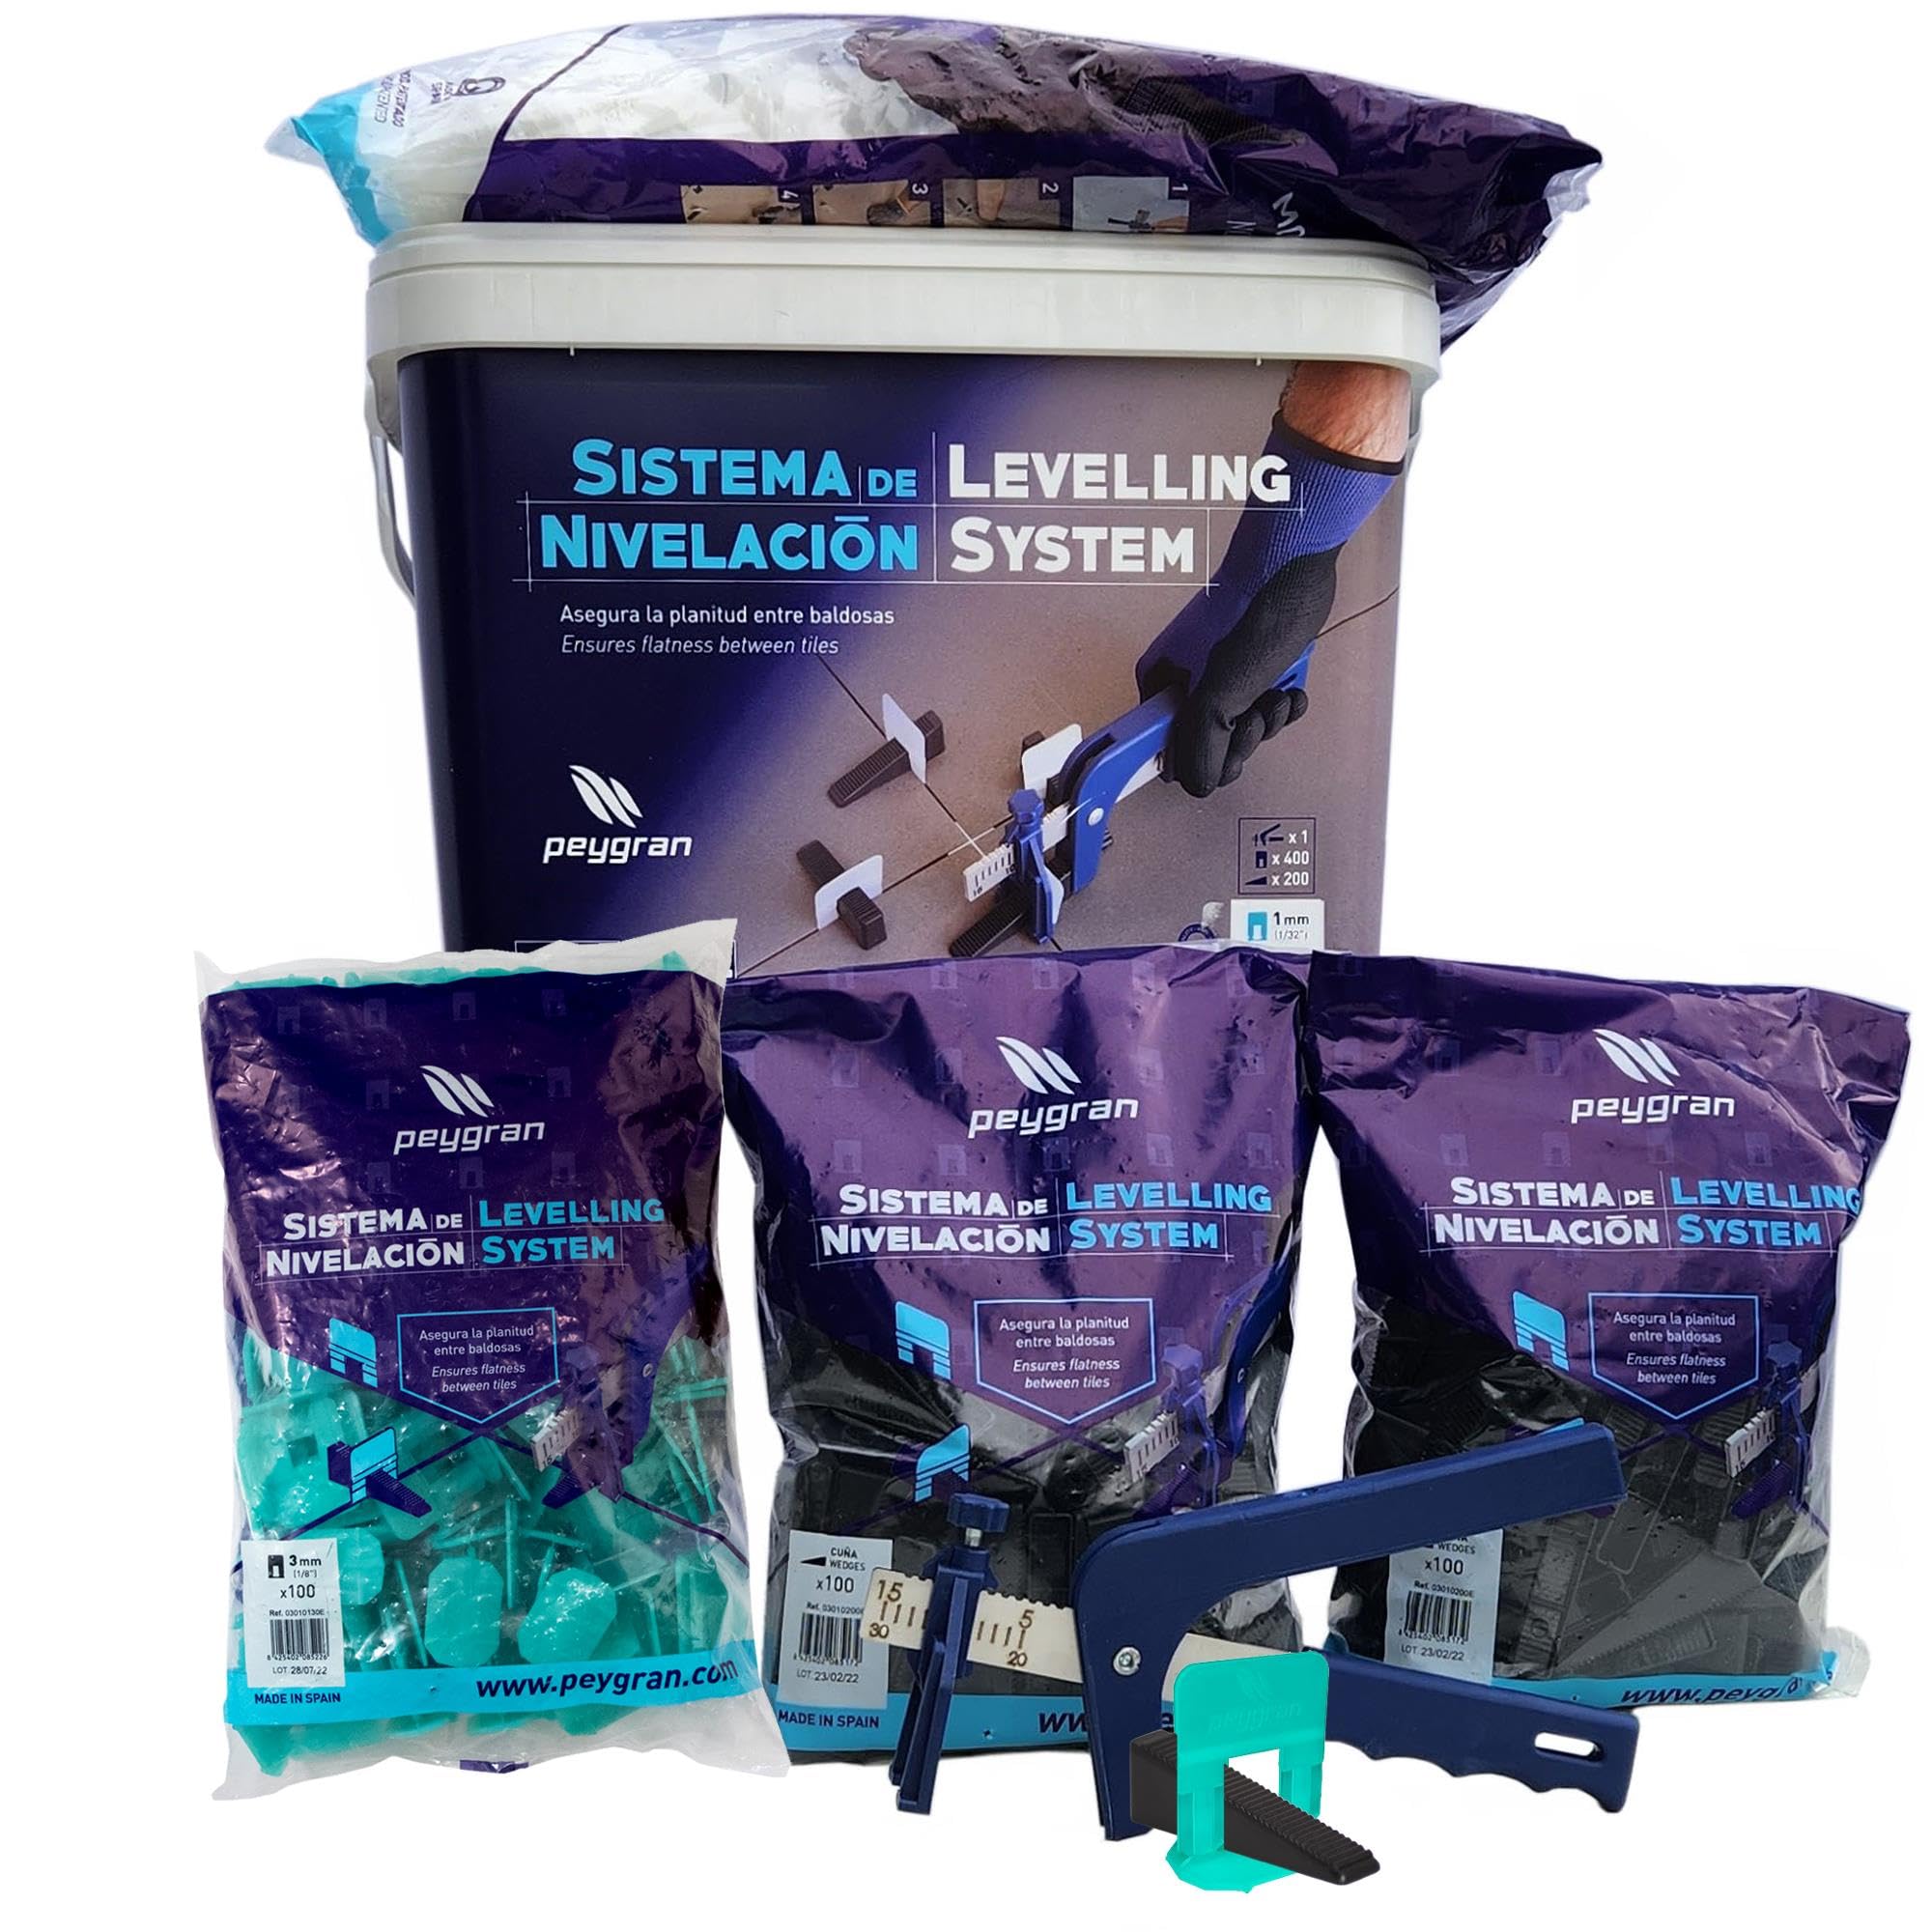
| Manufacturer | Industrias Peygran |
| Part Number | SUPER KIT 2MM |
| Item Weight | 8.27 pounds |
| Package Dimensions | 14.57 x 10.63 x 9.25 inches |
| Item model number | SUPERKIT3MM |
| Is Discontinued By Manufacturer | No |
| Size | 1/16" (2mm) |
| Batteries Included? | No |
| Batteries Required? | No |
T**T
Very good system that does solve a problem
Lippage. Now I know what it means. Didn't know before, and I had done tile in the past-- and that method needs to be left there.So I have installed floor tile and wall tile with varying results. the biggest issue always persists is that the edges never quite line up as they should. You can get close... but I am just not that good and I always have a learning curve between projects as it seems years between them.This time around was wall tile. 18x6 and a whole lot of them. The walls were done correctly, but my God--- nothing is every right as I have found out before. In this case it was no different, but using this system made all the difference. At first it was like riding a bike--- took a few tries and had to think it through, but once you get rocking along... it is fast and four things happen..... First the spacing is consistent as long as your tiles are. I had a few trouble ones, but that is the nature of the beast. Overall (99%) of the time it was 3mm (1/8") as expected. Second is flatness. The ramps are stiff and are strong--- so it definitely pulls the tiles flat. That is the key-- everything is flat. Run your hand over it, put a straight edge on it flat. Bliss. Third, you will run out of spacers faster than you think, so buy plenty. Forth thing that happens goes along with the spacers, you will also run short of the ramps if you intend to go further than you thought.....that is how I found out both of those things.So in the end, the kit worked great and out of 800 clips--- 1 broke during install otherwise it was slip, set, click, go. Again, it made what was normally a tough job to make everything level....a much easier job to make it level without a doubt.Would I use it again? Yes. It actually made the job much more pleasurable than it had been in the past. I can say someone that is an expert in the field will be able to do a great job without them...but I would never attempt another tile job without having them as they are that helpful.As far as thinset mortar--- started out with whatever HD sells premixed...and was complete garbage. Ended up heading to Lowe's and trying Mapei brand....so much better. Used the premixed to save myself from one more step, but between it and the spacers--- the job came out great!
D**.
Great product for the DIYer
Before purchasing Peygran Tile Leveling System I did my research. I have done tiling projects before but I have always used the little + shaped spacers which I found difficult to use and hard to remove one the tiling was done. In addition, I typically had to remove tiles during the process to either add or remove thinset so I could have a level floor. The Peygran system made the entire project much easier.My project was a fairly large one in an L shaped kitchen. Once I laid out my reference line and laid a few tiles, I was able to complete the job faster because I was confident the tiles were level (after checking from time to time). so I could move on to the next tile, or row of tiles more quickly. Using the Peygran system not only kept the tiles level but, as you can see from the photos, the system kept the grout lines were very straight over a distance of 14 ft. and around the L shaped kitchen. Also, if you follow the directions, and watch a few YouTube videos before starting there is no removing tile to add or remove thinset. Removing the leveling system was also faster, instead of trying to get those small spacers out of the grout lines you just hit the tabs and wedges with a rubber mallet, or kick them off with your foot and sweep them up. All very quick!This is definitely more expensive that the old + shaped spacers but the time savings was worth it in my opinion. Overall, I am very satisfied with this purchase as a DIYer, but professionals may want the more beefier products out there with larger clips and wedges because they will be used more frequently.
J**G
Too expensive, but highly effective
The wedges (and therefore sets) are way overpriced. I do a lot of molded plastics in my work and these are double what they should cost. That said, the system works and I didn't have one clip break early or fail to break when I took a mallet (or boot) to it later on.Key things to note:-Test the plier strength early on. You set it to the number of mm thick your tile is (may need to increase for cupped tile). I ended up dialing it down to 5.5 on a 1/4" ceramic to ensure tight clipping. Not one broke early.-Wipe the thinset back a little before setting them in. Don't wipe it completely away or you'll lose strength, but enough that you get less squeeze up around them.-Keep them back from the tile corners and at least 2" from walls or cabinets (so you have room to knock them over)-Clip them early on, don't wait until you do a whole area or you'll mess with the thinset strength-Check your tiles to prevent drift after clipping (you'll still need traditional spacers, like the Tavvy reversibles that I prefer and some wedges or horseshoes).-Clean squeeze up before it hardens or removing the clips gets harder. If a clip doesn't budge due to thinset, try to scrape it out first rather than hitting the clip harder.I'll also say that my wife got a blister pretty quick doing a project with 700 clips. I haven't tried the ergonomic version, but the pliers that come with the kit aren't gentle on the hands. I took over and was fine, but I switched hands a lot as the day wore on.Lastly, the re-usable bucket is absurdly hard to open (painful to fingers). I'm a handyman and regular rock climber, so I don't know how anyone else is supposed to open this thing.Good luck.
Y**K
It did the job but
Generally speaking, it worked.However, I found two drawbacks.Wedges smell bad, really bad. It was so bad that I had to wear a face mask with a charcoal filter not to deal with the smell so strong it was. Once the bucket is opened there is a super-strong plastic smell ("cancer smell") which quickly spread around the house.Spacers suppose to be 2mm. In reality, the range of spacer thickness lies between 1.67 to 2.07 millimeters. I worked with 6x36inch tiles. You can notice the seam between tiles is uneven if you managed to place a thin 1.7mm spacer on one end of a tile and 2.05mm thick one on the other and the next tile starts with another 1.7mm spacer. The solution was to take a caliper and measure/sort ALL spacers by their thickness and then use them this way. I ended up with some seams to be 1.7mm, some 1.8mm, and so on up to 2.05mm wide ones. For my project, it wasn't affected the final results but it cost me an extra couple of hours for sorting.
M**C
Excellent product
Really easy to use, I used it to install 29”x 29”‘porcelain tile on my wall and 6”x 36” ceramic tile on the floor of my bathroom. All tiles were square and leveled. I recommend this product.
D**D
Costly but worth it!
I like everything about these clips, I could never believe how I got along without them for so long. They work perfectly! Other than the price and having to buy new spacers for every application, these are the best I've ever used.
J**S
This is a highly reliable product.
This is a highly reliable product. Not a single clip brock during tile installation. Although the price is a bit on the higher side, this product is highly recommended.
R**S
Perfect job every time!! Although a bit pricey
Easy to use! Makes tile job perfect!! +++ expensive. Not sure if it’s $$ this site or just this particular product
TrustPilot
1 周前
3天前