🚴♂️ Elevate your ride, elevate your space!
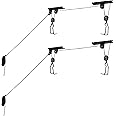
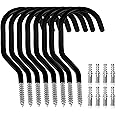
The RAD Sportz Bike Hanger is a durable overhead pulley system designed for indoor garage ceilings up to 12 feet high. Featuring a 100lb load capacity, rubber-coated hooks, and a secure safety lock, it offers a professional-grade solution to maximize storage space while protecting your bike or ladder. Easy to install and built in the USA, this 2-pack set is the original hoist trusted by cycling enthusiasts.


| Color | Black |
| Brand | RAD Cycle Products |
| Material | Metallic-Fiber |
| Item Weight | 1.82 Kilograms |
| Product Dimensions | 12"L x 12"W x 6"H |
| Mounting Type | Ceiling Mount |
| Load Capacity | 100 pound |
| Orientation | Rear" or "Front |
| Manufacturer | RAD Cycle Products |
| UPC | 885333131429 885479572728 885425722108 885298275985 885337884369 885678239255 885839771716 885874929752 885274894926 885399539641 885181482650 885889988294 786372972083 885388250380 885909208241 885760804569 613103032023 885463625416 885265926780 885153980788 885196185935 885465508496 |
| Global Trade Identification Number | 00885333131429 |
| Item Package Dimensions L x W x H | 11.02 x 10.39 x 4.57 inches |
| Package Weight | 3.56 Kilograms |
| Item Dimensions LxWxH | 12 x 12 x 6 inches |
| Brand Name | RAD Cycle Products |
| Country of Origin | United States |
| Model Name | Bike Hoists - Overhead Pulley System with 100 lb Capacity for Bicycles or Ladders - Secure Garage Ceiling Storage by Rad Cycle (Set of 2) |
| Suggested Users | unisex-adult |
| Number of Items | 2 |
| Part Number | 2004 RAD Bike Hoist 2 Pack |
| Style | 2-pack |
| Included Components | Hoists |
| Size | 2-Pack |
J**
Works great after some modifications
As some other reviews have noted, the install can be a bit tricky. I decided to mount the pulleys to a 2x4 sitting on top the rafters in my garage because I wanted to get the bike as far above the floor as possible. This also made the installation easier because I was able to get the pulleys positioned and screwed to the 2x4 while I was standing on the floor instead of trying to do it while up on a ladder.First I measured the bike to gauge the approximate distance the pulleys should be from one another. Then, I taped the pulleys to the board using strong gorilla tape. Next I suspended the board at about eye level between a ladder and a shelf in my garage, threaded the rope through the pulleys, and attached the hooks to my bike and gave it a try at ground level more or less. (Had the tape not held the pulley brackets in place for the test I would have used some small screws as temporary holders but the tape actually held it fine so I didn't need to do that.) Once I confirmed that the bracket placement was correct, I attached the pulley brackets to the 2x4's using the screws provided. Others have noted the screw quality it not very good. I think that's correct, but by drilling the proper size pilot hole I didn't have any trouble with them. Next, with the brackets attached to the 2x4, before I got up on the ladder and finagled the two before into place above the rafters. Once in the position I wanted, I drilled a 1-in hole through the rafter in between the brackets so that the line could pass through without any friction. See picture of this as well. During the first two initial tests my bike fell. My seat doesn't have a lip on the back of it and the hooks just slid off, allowing the bike to fall. I used a vice and a heavy mallet to bend the metal on the ends of the hooks so they would not be as likely to slip off the handlebars or the seat. I ultimately decided to use the hooks grabbing the seat rotated 180° from what is recommended so that they grab the seat from the front. See the picture I posted. With those modifications it works fine and doesn't seem likely to slip off. Some have noted that it lifts the bike unevenly. That is true. I lift the bike most of the way up, then pull down on the end of the bike that is higher, and then finish raising it the rest of the way. The total install took me about 2 hours, but it was worth it. Space is at a premium in my garage, and I don't have any wall space left to mount a bike, so this product was the perfect solution and I'm glad I bought it. I would highly recommend it just be aware you need to allow time to adapt it to your specific situation.
J**N
Nice ser up and easy to install.
Easy to install and works really well.
T**E
I'm a Believer Now
I've always been a little skeptical of the ease of use of these overhead bike hangar/hoist systems, but I decided to give one a chance: It works.My use case is a little different: I just had a whole house water softener installed and my garage is pretty full; I didn't realize how much floor space I would lose for the salt tank, so I decided the best way to make that up was to hang my table saw from the ceiling. I chose this particular hoist because (1) it was cheap, (2) it was rated for 100lbs (my table saw weighs around 50lbs) and (3) I like that the hooks have the extra "sideways" hinges in them, so they can open wider if needed.Installation overhead, in a garage, during the summer, in Tucson, is never a thrill, but it literally took me about:- 15 minutes to figure out exactly where I wanted the brackets/screw holes in my ceiling and joists- 20 minutes to install (including stripping a couple of screw heads)- 5 minutes to figure out I needed to flip it 180 degrees- 15 minutes to uninstall and reinstall itSo, less than an hour, and faster if you do it right the first time. Installation notes:- The supplied "lag bolts" suck, this is why I gave the hoist 4 stars instead of 5. Some kind of really soft metal, I stripped out the first two heads trying to screw them into my joists (with pre-drilled holes). Save yourself the hassle and make sure you have some decent 2.5-3" wood screws or lag bolts available, and just throw the supplied screws away.- I thought threading the rope through the brackets and then installing them on the ceiling (as recommended in the instructions) would be more hassle than installing the brackets on the ceiling first, then threading the rope: I was wrong, when the bracket is already installed on the ceiling threading the rope through the brake is a real pain. My recommendation: (1) install the bracket without the brake on the ceiling first (without the rope), then (2) thread the rope through the installed bracket and through the uninstalled bracket with the brake, then (3) install the bracket with the brake on the ceiling.- Figure out where you want the rope hanging down before you install: for the brake to stay tight (nothing drops), the rope needs to hang down straight with essentially no tension on it; to unlock the brake (so you can drop your bike, table saw, whatever) you need to pull the rope down and "away" from the bracket. I initially installed the brake bracket "pointed" at a wall, then realized I wouldn't be able to pull the rope correctly to loosen the brake, and I had to take the brackets down and switch the positions of them and rotate them 180deg.Actual review: It just works. It's easy to pull the rope and lift up something that's kind of bulky and a little difficult to keep balanced, like a table saw, so I think lifting a bike is just going to be trivial. Lowering is also easy, just (1) hold the rope tight, (2) pull the rope down and away from the brackets to disengage the brake, and (3) now raise the rope to lower your item.This works so well that I'm thinking about buying another one, specifically for my bike.
T**G
Going Strong even after 11 Years in Toolbox Exile
I bought these bike hanging pulleys way back in 2014, probably during a burst of "I'm gonna organize the garage this weekend!" optimism. Naturally, they sat untouched in a toolbox drawer for almost 11 years, nestled between some old paintbrushes and my dreams of entering the Tour de France.Fast forward to 2025. I finally decided to give my garage the makeover it so desperately deserved. I dug these pulleys out like an archaeologist uncovering ancient treasure. The instructions? Long gone—probably reincarnated as paper mache by now. But honestly, who needs instructions when installation is this simple?Despite the decade-long nap, these bad boys worked flawlessly. I mounted them to my ceiling joists using just a ladder, a drill, and a couple of choice words. The rubber-coated hooks cradled my bikes like a newborn baby, and the safety lock gave me peace of mind that it wouldn’t come crashing down during a midnight snack run.The best part? With my bike now floating majestically near the ceiling, I suddenly have floor space I forgot existed. I almost threw a dance party under it. These pulleys survived a decade in garage exile and still installed without a hitch. They're strong, safe, and make me feel like a garage MacGyver. Worth every penny—even 11 years later.
Trustpilot
4 days ago
5 days ago