🖥️ Elevate your projects with the power-efficient e-ink revolution!
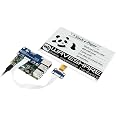
The Waveshare 7.5-inch E-Ink Display HAT offers a high-resolution 800×480 SPI interface screen designed for Raspberry Pi and compatible boards. Featuring ultra low power consumption and a standard 40-pin GPIO header, it delivers persistent, clear visuals without backlight, ideal for industrial, retail, and embedded applications.


| Standing screen display size | 7.5 Inches |
| Processor | MediaTek_MT8125 |
| RAM | LPDDR3 |
| Wireless Type | Infrared |
| Brand | waveshare |
| Series | 13504 |
| Item model number | 7.5inch e-Paper HAT |
| Operating System | Raspberry Pi OS |
| Item Weight | 3.52 ounces |
| Product Dimensions | 7.09 x 3.94 x 3.54 inches |
| Item Dimensions LxWxH | 7.09 x 3.94 x 3.54 inches |
| Color | 7.5inch e-Paper HAT |
| Processor Brand | VIA |
| Number of Processors | 1 |
| Manufacturer | Waveshare |
| ASIN | B075R4QY3L |
| Is Discontinued By Manufacturer | No |
| Date First Available | September 28, 2017 |
G**G
Great display
I did like most everyone else did and made a Portal theme calendar. First item came in damaged, but seller replaced that quickly. Display has been running for about a year with no failures.
J**S
Amazing screens and very easy to set up
Due to amazon's stance on linking to external sites, this review _can't_ post actual useful information (like the technical spec), but I will try my best.These screens are great. At 1-bit color depth (black and white) with a 800x480 display resolution, you can print a fair amount of content on them. The included ribbon and SPI interface board is amazing and makes things basically plug-and-play. Now, this is also in the maker space, so it isn't a generic thing you can plug in to any old computer. You have to have some idea of what they are and how to use them (but, as a hardware newbie myself, I was able to find the necessary information to get it up and running on a Raspberry Pi Pico (RP2040) within a week.From my perspective, the hardest part of using this product is literally wiring it to the micro-controller correctly; after that, it is just sending it commands, and data.The screen is about .8mm thick, and it is made of glass, so you will want to be careful with it. It appears to come with a protective film over the front, and they suggest that if you are using it for development purposes, you reinforce the back as well. I did this by taping it to a wooden clipboard, giving it a rigid surface to be flat against.The fact that this screen runs at 3.3v is great, you won't need a boost converter or any additional hardware to be able to run with most micro-controllers or Raspberry Pi units. I wish that some of their more expensive displays could also operate on 3.3v (instead of 5v, which a lot of them require).This screen supports true partial drawing/ refreshing, which is very nice; though does take a bit of time to get used to as you specify the banks that are going to be drawn and refreshed with the command, instead of the raw pixels you want to modify (in this case, a bank is 8 pixels wide by 1 pixel tall).Full screen refresh appears to take around 5 seconds, so it isn't the fastest out there. It is also worth noting that they strongly suggest that you don't leave the display powered up at all times. The main loop flow diagram they have shows powering on, initializing the settings, drawing the content to the screen, and then power off followed by deep sleeping the display. So long as you don't disconnect the screen from power, you can go through a truncated restart process where you just re-send the settings and can draw right afterwards. This saves a little time, but the entire boot sequence really doesn't take very long (at least in comparison to a redraw).Waveshare has a website with a wiki which contains all the technical specifications for their various displays, and they also have a github with examples on a number of embedded devices for each of their screens. I can't post direct links, but a quick web search should be able to turn those up.
J**Y
Not bad!
It works well. I suggest using ChatGPT or something to get it going. I did and it got me the correct libs and code to render an image (make sure it's 1bit monochrome black and white 800x480). Make sure to enable SPI if on a rasp pi.Resolution is not great but def fine for some projects. You can use more bold/blocky fonts and images to clean it up.
D**X
7.5 Inch, good buy, great programming fun!
Waveshare 7.5inch E-Ink Display HAT for Raspberry Pi 640x384 Black White Two-color Display Screen SPI No Backlight Ultra Low ConsumptionCurrent user of the 7.5 inch screen. Screen refresh is adequate, it will flash entire screen while displaying though (usually alternating 2 between black and white). It may be possible to implement partial refresh of the screen, however I have not had any luck doing so ( or finding sources ).Here is a list of source code in order of most responsive to least on a PI W0:BCM2835: By far the fastest source code to use, likely due to direct access to GPIO device memory /dev/mem. Typically as soon as I invoke my executable, the screen is responding within the first couple of seconds.WiringPi: Typically as soon as a run the executable there is a notable delay of a few seconds before the screen is responding. Still quick, but not nearly as quick as the BCM2835 based source code.Python: The Python source code is by far the slowest with an extremely noticeable delay before the screen is responding. The only time I've seen Python work quickly on the E-Ink display is with smaller, less intensive displays.Screen is great if you don't mind the flashing refresh, I'll update later if I find a way to implement partial refresh, or if the manufacture let's me know of any new source code implementing that ability.
J**F
Could never get it to display anything.
Could never get it to display anything. I watched every youtube vid and read every blog and github project. I programmed this thing for days on end. Even had chatgpt try to help program it for me. Used the sample code provided by waveshare as well. Nothing worked. Never able to display any pixels. Returned.
C**I
Works great with ESPhome and Home Assistant
If you know what you're doing in Home Assistant and ESPhome then you can put in a little work to make a custom display like this that will communicate many things without getting in your face. That's why I like these screens. A subtle way to share info in the home.
K**H
Elegant e-paper Display
Hooked this up to a Raspberry Pi as an e-paper weather display. It's worked flawlessly now for months!
B**B
Impressed, works great
The media could not be loaded. This is my first e-ink display, i'm impressed so far. This has been fun to play with and start a project with. Documentation feels a little scattered, initially I struggled to get everything working. I was initially using the hat connection on my raspberry pi, when that wasn't working I switch to using the direct wire connection. I'm not sure if it was the hat connection or not, I need to test that again, but with direct pins it's working.I have tested both the c and python libraries provided by waveshare. Make sure to get the correct version. The sample files run through a lot of the features, drawing images, shapes and partial refresh.Try some things out and you can get a feel for what is possible.