🚀 Tow Boldly, Tow Smartly — Upgrade Your Jeep’s Hauling Game!
The ECOTRIC Class IV Trailer Hitch Receiver is a robust, powder-coated steel towing solution tailored for 2011-2022 Jeep Grand Cherokees. Featuring a 2-inch square receiver and weather-resistant finish, it offers durable, rust-proof performance with easy bolt-on installation—perfect for professionals and enthusiasts ready to elevate their towing capabilities.


| Brand | ECOTRIC |
| Vehicle Service Type | Trailer |
| Material | Alloy Steel |
| Finish Type | Powder Coated |
| Automotive Fit Type | Vehicle Specific Fit |
| OEM Part Number | 82212180AC, 82212180AD |
| Manufacturer | ECOTRIC |
| Model | ET-117A+ET-117C |
| Exterior | Smooth |
| Manufacturer Part Number | ET-117A+ET-117C |
K**C
Great quality!
Nice! Fits like a glove, MUCH heavier duty than the original cheapo stamped bumper, btw!Video on line makes install a breeze. Hint: use a multi tool to cut through original bumper pad!
J**A
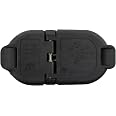
Wiring harness
The product was excellent and fit perfectly with my vehicle, however the proper wiring harness was not included or recommended. Still trying to find the proper wiring harness for this product.
T**M
Quick installation and looks factory
Installation took about and hour and a half. The longest part was cutting out the outline on the back of the lower fascia. I.saw several videos on this installation and found it easier to remove just the lower fascia instead of the entire bumper. There were five or six white clips ( pictured above) to remove a screw in each fender well (7mm). And two screw.for the exhaust heat shield which let's you get to the other clips. I paired the hitch with https://www.amazon.com/dp/B00GBW0BLO?ref=ppx_pop_mob_ap_share which is the factory molars plug. I did have to activate the trailer lights, but instead of taking to the dealer I purchased obdlink MX adapter and downloaded the alphaOBD program to do it myself (online videos to help with this process). There are cheaper adapters that will work but purchased this one for some of the other features. Note: the hitch is shipped in two separate packages which I did not know at first, but contacting the seller which had AWESOME customer support. I did find the hitch a bit loose like some of the other reviewers, but nothing out too much out of the norm. Hope this review helps!!
D**I
Doesn’t fit to Grand Cherokee 2015. Manufactured defects.
This hitch doesn’t fit to my Jeep Grand Cherokee 2015. It’s 1/2 inches narrower then the holder where it should slide in. Also, one of the screw hole was filled with the welding, so it could not be screwed. In addition one screw got broken when try to assemble this Receiver.As a result, wasted 3 hours to disassemble bumper, try to install hitch receiver, then assemble bumper back. Then lost 20$ to return it.
C**.
Very Impressed!
For those who don't understand how this hitch differs from the 3rd party hitches, like myself, I've added a picture that hopefully helps.For starters, this hitch actually replaces the stock rear bumper/crossmember, so is essentially part of the vehicle. That said, I don't think you would get a better tow rating or experience than this one.Installation was really easy and all the parts were there.The installation instructions detail that you need to remove the entire rear bumper. However, I only had to remove the bottom, black piece on mine by popping out the little snap pieces holding it to the painted bumper. I have a 2017 Limited, so I'm not sure this is the case for all of them.If you DO have to remove the entire bumper, please take note that you will need a special rivet tool for plastic body panel rivets. I found one for $25 at Advance Auto Parts.All in all, I'm very happy with the hitch and the ease of installation.I'm a little put off by Chrysler that I need to take my Jeep to the dealer and pay $125 to have the trailer lights "activated", but that's another story.
J**E
Read my full review!
Alright so first, know this ships in 2 shipments. The second shipment takes I'd say a week later to show up. I was disappointed that it wasn't stated when I ordered it and I thought I was missing parts. Ended up talking to customer service and they were great. Everything was sorted out after I already had it installed without the missing cover piece. My bumper was cut to make up for not having that cover in time but it ended up looking fantastic!!! The set up looks factory. Was able to trailer that same day. Also know it takes hours to install. Your entire bumper has to come off. The price is great for what you get. 5/5 on the product itself and 5/5 on customer service!!! I can't post my pictures of the after since it won't look the same since I ended up having my bumper cut and not using their cover.
A**R
Great OEM look after minor modification!
Bought this in conjunction with trailer hitch installation skirt for lower portion of 2021 Grand Cherokee which had no OEM towing package features. It worked fine with the skirt from Amazon and mated up with all tabs (note: no clips are included with order). The only small challenge was making minor trimming modifications to the opening for the electrical box that came with the Drawtite factory-style hitch. Took a few extra minutes.
A**Y
Great product
Fairly easy install, would recommend watching a couple youtube videos on the trim removal for the bumper as it's somewhat challenging to remove without breaking clips. The instructions were good. I did have some difficulty removing the bolt near the exhaust, you'll need a Universal socket joint or a wrench (13/16ths i think). Also, the light hole in the hitch is specifically made for the Mopar snap in connector. (It's listed in the "frequently bought together" section) but as for the hitch itself, it's very well made and everything slid in place like it should!
Trustpilot
1 week ago
5 days ago