🛠️ Fix it fast, fix it flawless — because your walls deserve the best!
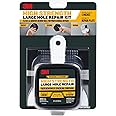
The 3M High Strength Large Hole Repair Kit offers a fiber-reinforced spackling compound designed to repair 3"-5" diameter holes with 5X faster application. It includes a customizable repair plate, putty knife, and sanding sponge, ensuring no shrinking, cracking, or sagging. Suitable for both interior and exterior walls, this kit delivers professional-grade results with easy sanding and durable adhesion.


| Manufacturer | 3M |
| Part Number | FPP-KIT |
| Item Weight | 11.4 ounces |
| Product Dimensions | 3.7 x 7.75 x 11 inches |
| Country of Origin | USA |
| Item model number | FPP-KIT |
| Is Discontinued By Manufacturer | No |
| Size | 12 oz. |
| Color | 12 fl. oz. + Kit |
| Style | Repair Kit |
| Material | solid |
| Shape | shape |
| Power Source | power_source_type |
| Item Package Quantity | 1 |
| Special Features | Fiber Reinforced, 5X Faster Repairs |
| Usage | Wall Repair |
| Included Components | 1-Kit |
| Batteries Included? | No |
| Batteries Required? | No |
J**A
Great product!
The puddy that came is more than fair. I patched up 10-15 good sized holes 4''-7'' inches wide/long. I still have a little bit left. I will be buying more and more than likely a bigger product/ more puddy.
B**N
Good
Works great
D**D
Easy to use
It filled the hole in my wall, was very easy to use, and it came with everything I needed to do the job
J**N
Easy to use
My son tripped and fell and his knee went into the wall. Since he made the hole I had him help me fix the hole. We ordeed this kit and followed the instructions. The only obstacles we ran into along the way was the adhesive on the grid was not strong enough to attach to the inside of the wall. We ended up using super glue and that worked. Once we got the grid attached it took a little trial and error but we got the mud to stick to the grid and start to build up so we could bring it flush with the wall. We did one coat and let that dry overnight. In the morning we sanded it and did a little bit more touching up. In the evening we sanded again and then painted. In the final picture the paint is still a little bit wet. Since this is at the bottom of the wall in a low traffic area of the house, we didn't bother to add texture. I don't think anyone will notice. I would recommend this kit. If a mom and her 13-year-old can do it then I think anyone can.
I**E
Love it!
Love it! Works for both inside and outside walls
M**M
Works well
Works well. The compound is light and thick. It goes on easily.
W**W
As Long as Your Hole Is a Rectangle
It was too small for the odd-shaped electrical wiring hole in the ceiling. What can I say, there are better solutions for holes not made by your doorknob, for goodness sakes. Better yet, put in a spring loaded door stop.
P**S
Here's The Trick
This item is just like most items that require being glued to something. It Must be clean, sheetrock is extremely dust so very little would ever stick to it. The backing board has 2 pieces of 2 sided tape toapply to the sheetrock backside for strength. When you have the hole the size needed use a damp rag andlightly clean the edges and backside. Allow to dry overnight then take duct tape and roll a piece into a ballplace it into the hole so the remaining dust now sticks to the tape. Use a couple of pieces just to make sure it's clean then lightly do the same thing to the edges. I then placed scotch tape around the edge of sheetrock so dust wouldn't get on my backing board. Carefully install the backing board and remove the scotch tape before you apply pressure to the backing plate. I then used part of the mud around the wall edges and pulled the backing board into place and held tightly as instructed. Be sure not to let any of the mud get on the area where the 2 sided tape needs to stick. Then follow the rest of the instructions as directed and Not Applying to much pressure when adding the mud to backing board. Drying time is crucial for strength of the sheetrock mud. Sand and recoat in low areas allowing time to dry completely.
Trustpilot
1 month ago
2 months ago