🚿 Elevate your bathroom build with leakproof precision and pro-level ease!
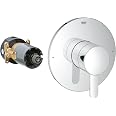
The GROHE 35026000 Grohflex Universal Rough-In Box is a robust metal housing unit designed for universal 1/2" inlet and outlet connections. Featuring leakproof construction, dual fixing points, integrated service stops, and a removable protective cover with installation guidance, it ensures a secure, professional installation compatible with GrohFlex Bathroom Solution Kits including pressure balance and thermostatic valves.


| Material | Metal |
| Brand | GROHE |
| Item dimensions L x W x H | 7.2 x 6.8 x 6 inches |
| Exterior Finish | GROHE NO FINISH |
| Inlet Connection Size | 0.5 Inches |
| Inlet Connection Type | FIP |
| Outlet Connection Type | FIP |
| Number of Ports | 2 |
| Outlet Connection Size | 0.5 Inches |
| Specification Met | Universal Valves, Pressure Balance Valves, Thermostatic Valves |
| Valve Type | Universal Valves, Pressure Balance Valves, Thermostatic Valves |
| Global Trade Identification Number | 04005176891786 |
| Manufacturer | Grohe |
| UPC | 400517689178 |
| Part Number | 35026000 |
| Item Weight | 1 pounds |
| Product Dimensions | 7.2 x 6.8 x 6 inches |
| Item model number | 35026000 |
| Is Discontinued By Manufacturer | No |
| Size | 6.95" x 6.30" x 7.25" |
| Color | GROHE NO FINISH |
| Item Package Quantity | 1 |
| Usage | Inside |
| Included Components | Product Only |
| Batteries Included? | No |
| Batteries Required? | No |
A**R
Great product. Easy to install, but difficult to understand what all you need for your shower...
Very happy with the quality and function of this rough-in box. The problem I had when I started, as a novice homeowner, is figuring out what the heck I needed to use for my shower. I will not claim to be an expert, but I will say with a high degree of certainty that this rough-in box works well for my shower-only, when coupled with the GrohFlex controls that you also have to buy. Keep in mind that while the choices of fixtures seem endless, there is really only a few choices or designs of controls that work with this particular rough-in box -- I think.The documentation and directions that come with the box are poor to non-existant. As a novice homeowner, with zero experience with shower fixtures, I did manage to install it easily. I posted a video of my novice perspective on YouTube. I will put the like below, but not sure whether it will work. If not, search "novice GrohFlex installation" and it should come up on top of the page.https://youtu.be/QYcpjk5TZjI
R**.
Love the final rough in box, Easy if you have access to the back of the shower
So far so good.I like the idea that all connections are contained in the blue box.NOTE: I had access to the back of the shower so it was easy to screw fittings on to the box with white plumbers tape after I made some solder joints away from blue box or else it will melt the box if you solder real close.1.) When you mount the box there must be a lip inside the tub for the trim to fit later. (follow the white sticker you see on top in the picture.)NOTE: If you don't cut/trim the box the finished cover kit screws are not long enough to reach inside the box. (it happened to me)2.) I caulked it first with the lip then took a fine tooth hack saw to flush cut the box to the tile after the caulk dried.See the sticker on the blue box to determine how far in you need to be beyond the tile before cutting.IMPORTANT: Do not remove the white insert until you run water/FLUSH the pipes after the solder work.Those screws on the hot and cold pipe inlet in the box are ball valves.3.) Let water pour out the shower head and the tub at the same time on full open valves.You will see white grease and solder paste flow out dirty. Do that until the water is perfectly clear from the cold and hot.That removes all the dirt metal slivers inside the pipes and it will not clog the new mixing valve later.4.) I closed the valves removed the white insert. Pull slowly with channel locks. Grip it in the middle where there is a thick tab.The insert is tight because of the grease and rubber O seals.5.) Grease the new purchased Grohe mixing faucet valve with the provided white O ring goop.Press in and secure the four screws .5.) Open the ball valve screws with screw driver. Hot and cold.Try the new faucet for hot and cold mixing.NOTE: I ran water with the new mixing valve for a few minutes and then I removed the mixing valve to adjust the hot water setting and found some metal filings on the mixing valve catch filter.I think when the mixing valve was added it created new pressure that forced some metal copper slivers to move in the pipes.So its IMPORTANT to FLUSH (run water hot and cold) without the mixing valve for longer than 5 minutes.my2cents.FYI-If you have kids and everyone is getting ready in the AM at one time get the Grohe Thermostatic valve, more $$$ money but no more big water temperature change in shower when everyone is using the sinks and toilets in the house at once.That's another review.
E**M
like all Grohe products is a quality item
This product, like all Grohe products is a quality item. It looks and performs as expected. The pressure equalization feature works incredibly. No more temperature changes due to a flushed toilet. Would definitely buy it again. Easy to install trim/control module.
E**N
This rough-in has self contained water service stops making it a joy to shut off the water supply at the shower ...
Shopped high and low all over the web and in the end purchased this Grohe rough-out for $77...cheapest price I could find. Current basement bathroom renovation required a reliable quality shower/tub fixture which would stand the passage of time, have a abundance of repair parts, but more importantly be problem free for as long as possible. What sealed this deal with Grohe was the actual design of their latest Grohflex modular trims which supported either pressure balancing or a thermostatic valve. Down the broad I could go from thermostatic to pressure balancing by swapping out the module control valve body. Everything eventually leaks or breaks and shower valves are no different. This rough-in has self contained water service stops making it a joy to shut off the water supply at the shower level for repairs and updates. Only caveat being you must exercise caution when sweating on the supply lines as the plastic body is NOT heat resistant. Grohe can improve their documentation however by clearly explaining what all the options are when you use their Grohflex rough-in.
M**.
New stuff
Very Nice I would buy again.
M**J
Great rough in valve
I really like this system. It took me some testing to figure out the best way to install it. I have 2x4 walls and used half inch Durock followed by 3/8 inch tile. I first anchored a piece of half inch plywood against the sheetrock inside the wall. Then using just the rear anchor points on the rough in valve, I had plenty of stability and just the right amount of exposure outside the wall. It has more mounting options for other scenarios which is nice but also made mounting it confusing at first. Construction is excellent. There are lots of choices for function and trim. Very happy with the purchase
L**E
Outdated part
This part (Grohflex) is outdated and does not fit current Grohe cartridges and trims. Only works with leftover stock. Unfortunately, even on Grohe's website this is not clear. Only when you look for trims and cartridges, you will find that all are disconitunued.The part itself works. I am still waiting for delivery of a cartridge and trim that hopefully fits.
J**N
Required for installation of Grohflex shower system.
Easy to install with bathroom remodel when shower is gutted to studs. After installing tile around the oval shape, just use a razor to cut off any excess plastic that sticks out past tile so that your shower face plate lays flush with the tile on top of this. Be sure to choose a shower system with a face plate large enough to cover this oval shape though.
TrustPilot
2 周前
1 周前